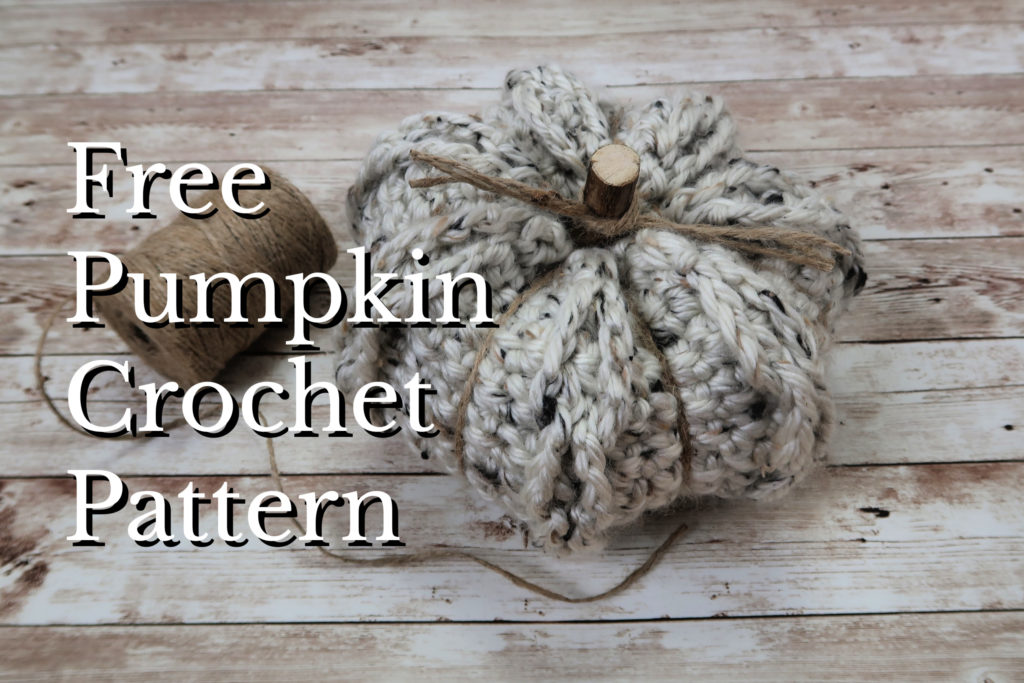
Fall is almost here, and I’m so excited!!! The weather gets cooler, scarfs and beanies, pumpkin everything is in abundance. I could go on and on about why Fall is my favorite season, but lets talk about this pumpkin pattern…
I was inspired to make this pumpkin from a throw pillow designed by Erica over at 5 Little Monsters. Every time I looked at the loops on the pillow, I would think… How cute would those loops be on a pumpkin? So, here it is… The cutest little loopy pumpkin.
*This post contains affiliate links, which means I receive a small commission, at no extra cost to you, if you make a purchase using this link.
An easy to print PDF download of this pattern is available in my shop …Click Here
Pumpkin Pattern Instructions
ch36
1. sc in 2nd ch from hook and each chain to end (35)
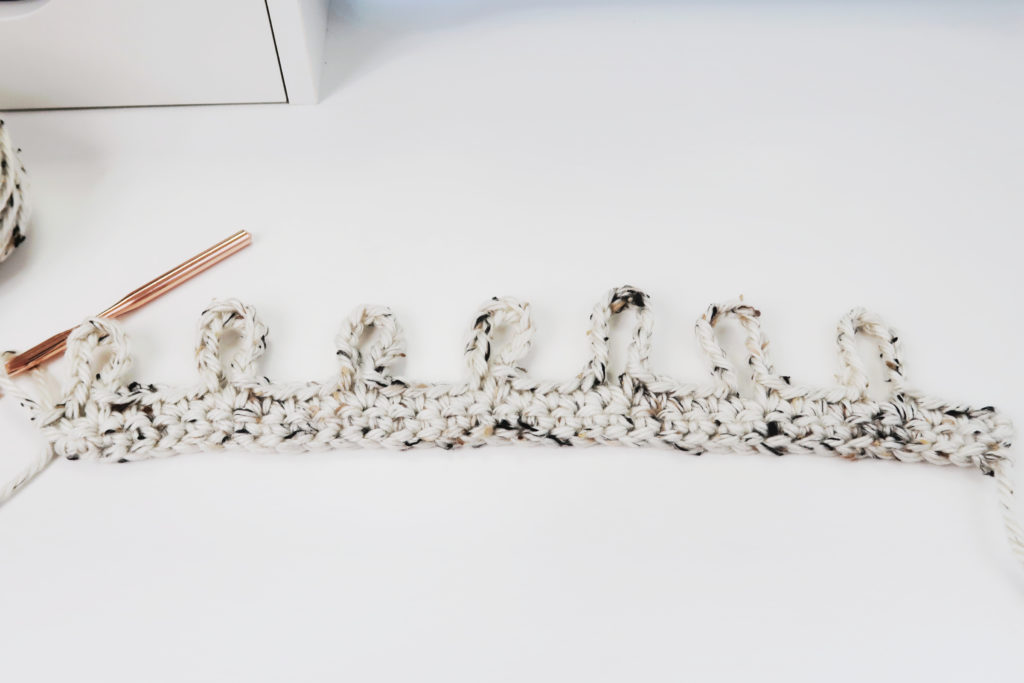
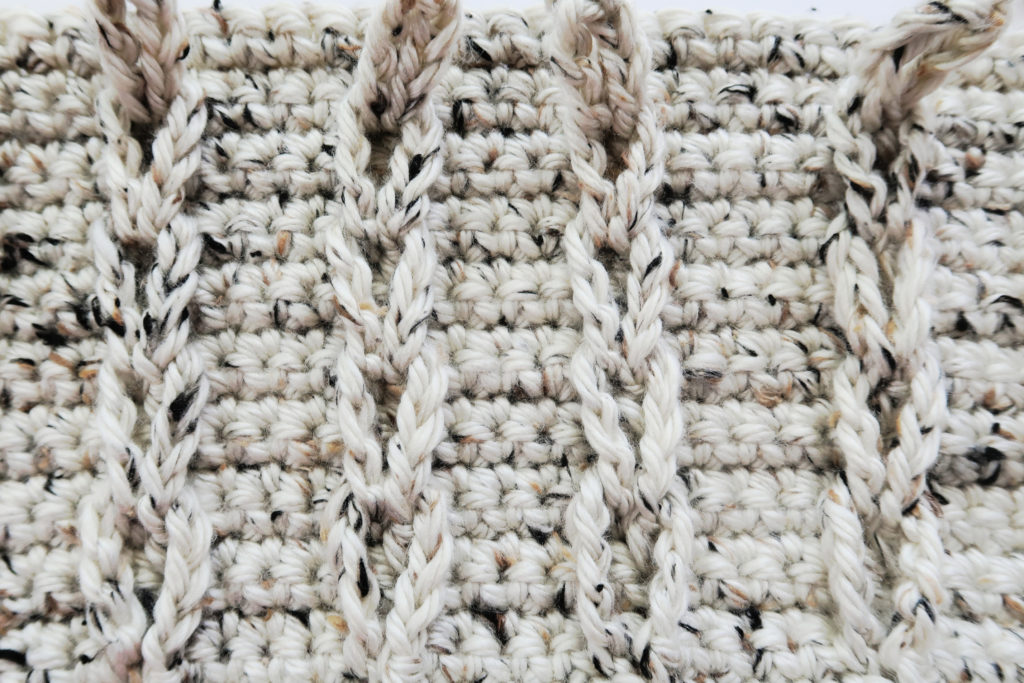
2. ch1, turn, sc in the next 4 sts, *ch10, sc in the next 5 sts, repeat from * 6 times, sc in last st
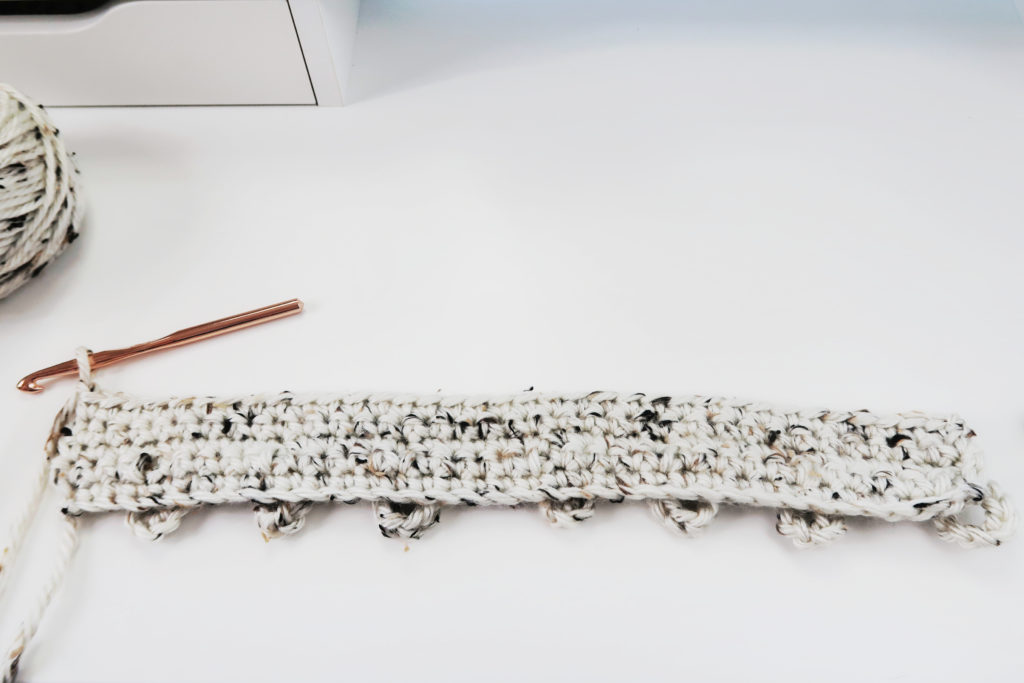
3 – 5. ch1, turn, sc in each stitch across to end (35)
When working row 3, make sure to push loops to right side and work stitch behind it.
Wrong Side
Right Side
6. Repeat row 2
7 – 9. Repeat rows 3 through 5
10. Repeat row 2
11 – 13. Repeat rows 3 through 5
14. Repeat row 2
15 – 17. Repeat rows 3 through 5
18. Repeat row 2
19 – 21. Repeat rows 3 through 5
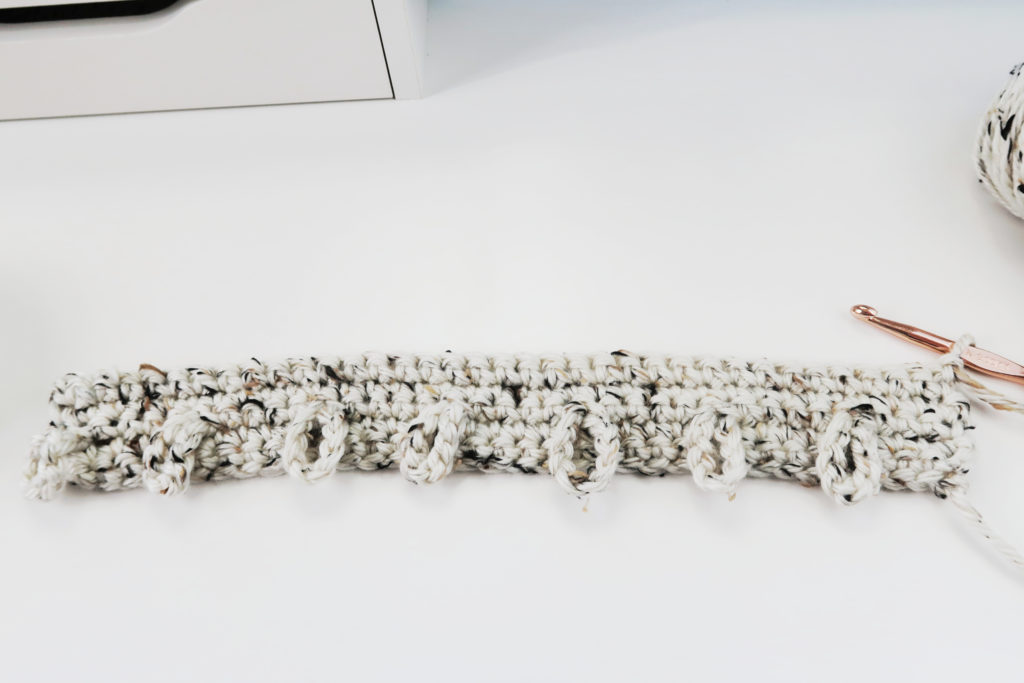
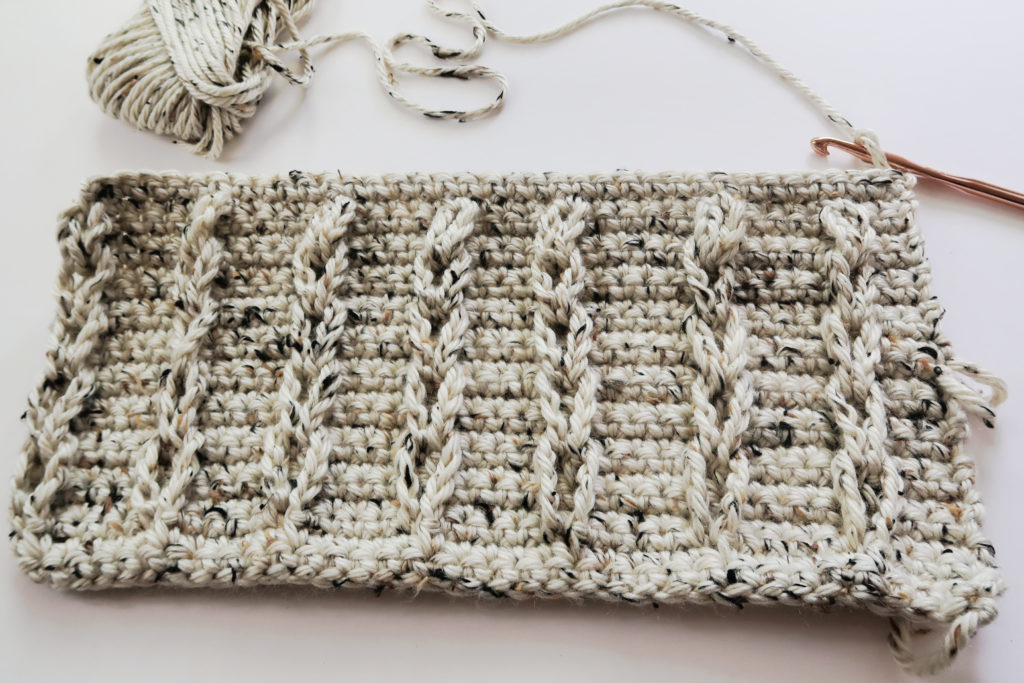
Weave the loops through each other as shown in the photo below.
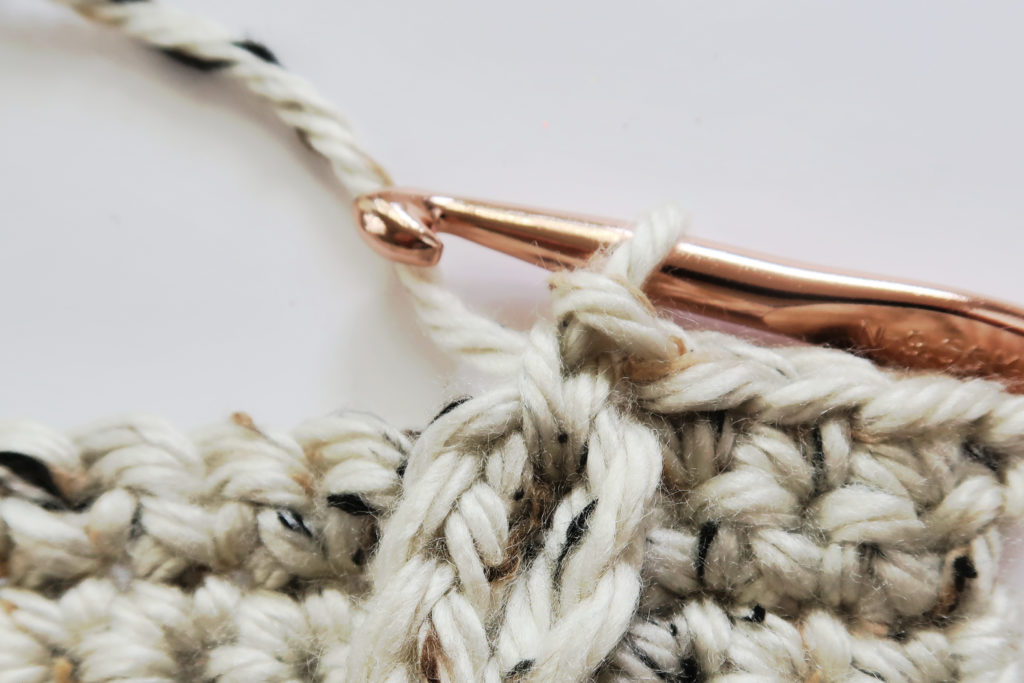
22. ch1, turn, sc in each st across to end (making sure to work through the loop when you come to one) work through the loop and the stitch, to lock the loops in place.
23. ch1, turn, sc in each st across to end (35)
Fasten off and leave a very long tail to stitch up the sides and bottom of the pumpkin.
Finishing the Pumpkin
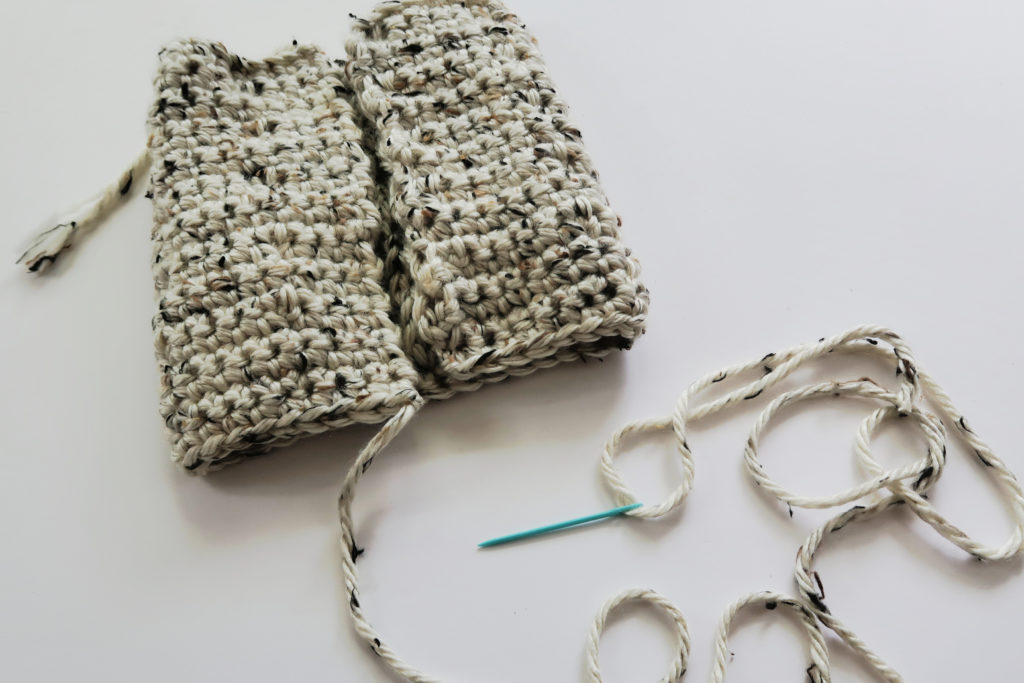
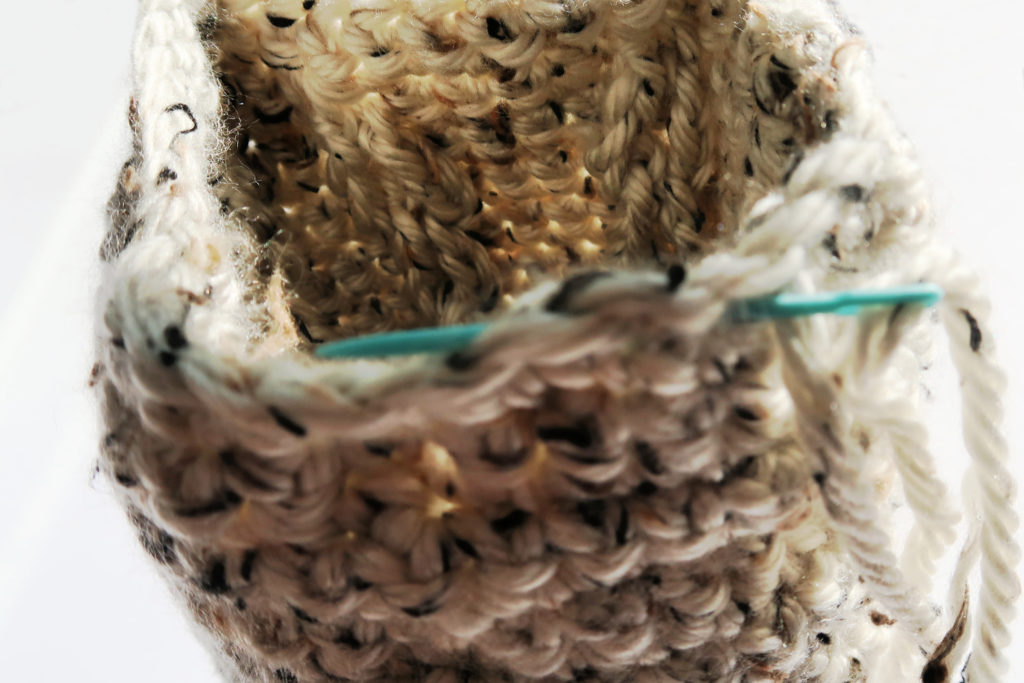
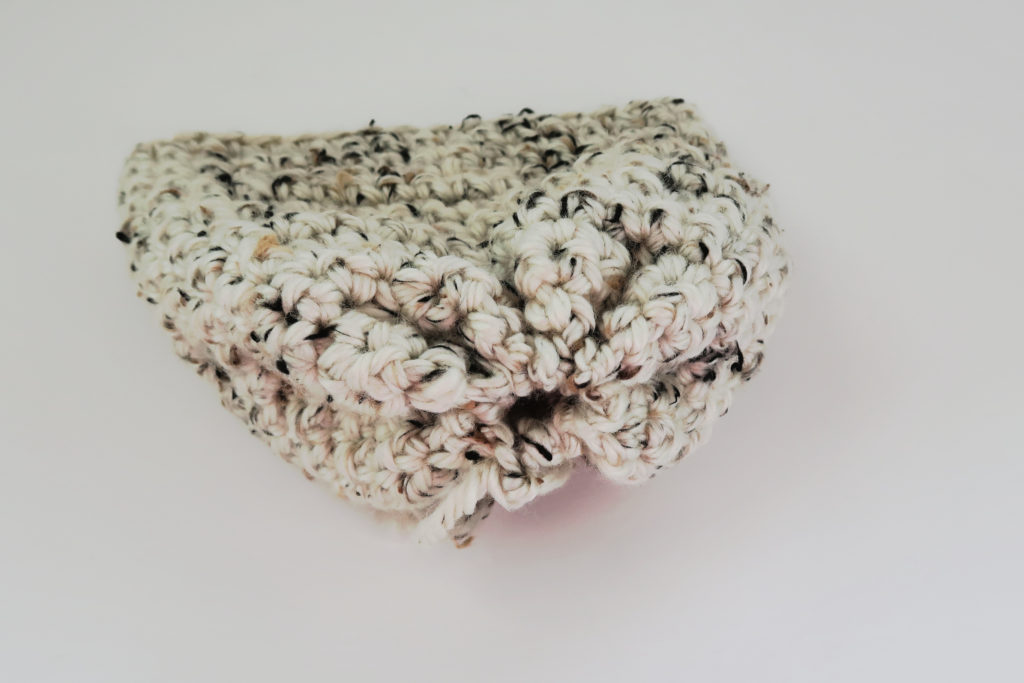
Bring sides together with wrong side facing. Join the sides together with a whip stitch, to create a tube. Do not cut yarn!
Weave yarn through the stitches, then pull to draw it closed. Tie a knot, then weave in all ends on wrong side.
Now, turn with the right side facing and stuff the pumpkin with poly fill.
Attach a long piece of yarn and weave through stitches and pull closed, just as you did with the bottom.
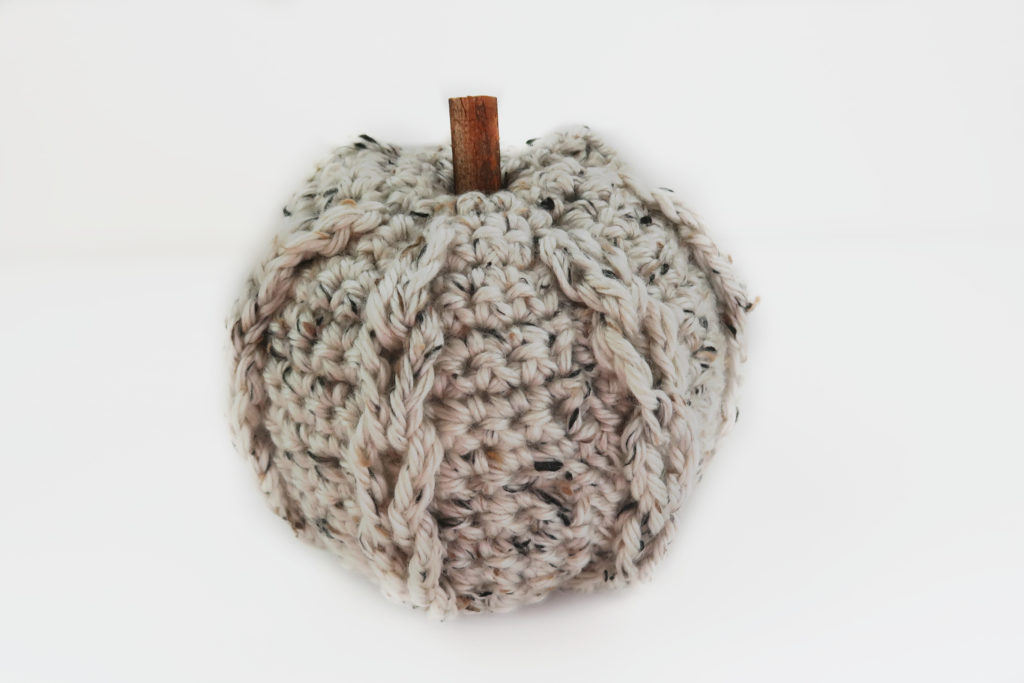
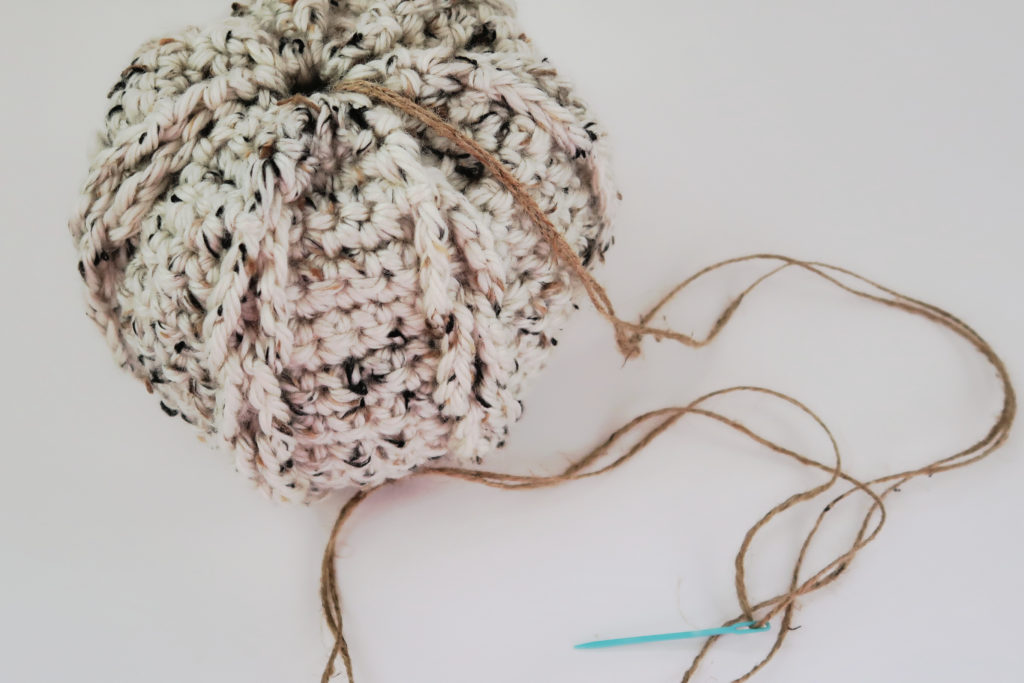
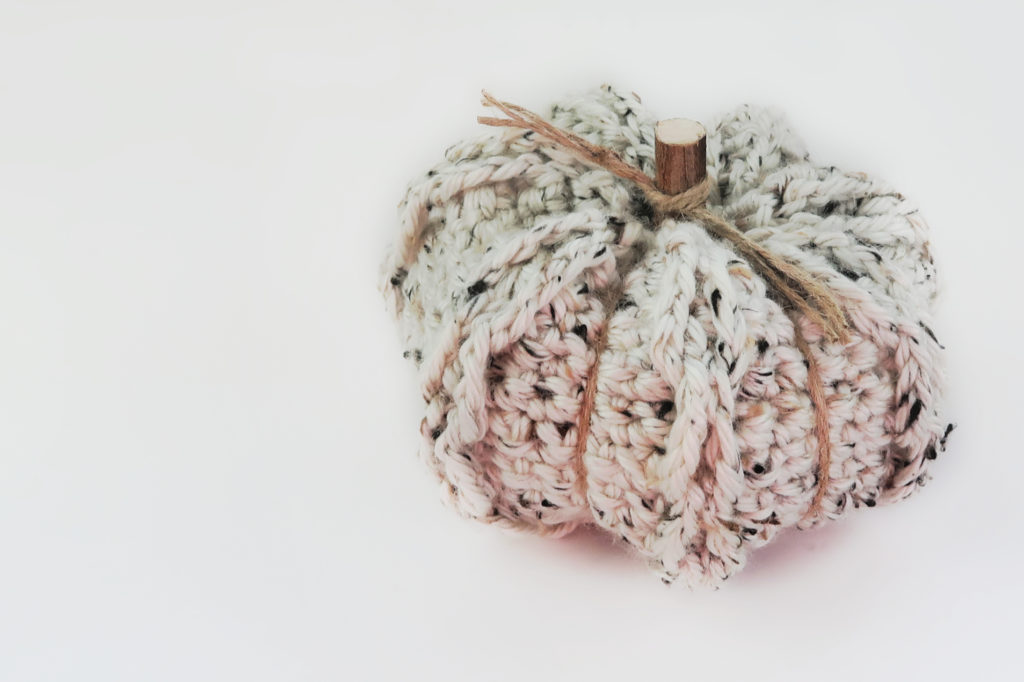
At this point, you can add a stem and be done, or you can divide the sections…
To divide the sections, you can use the same yarn, I chose to use jute. Cut a very long piece, attach it to the bottom of the pumpkin and draw it through the center, up to the top of the pumpkin. Place the jute between the loops and insert back into the bottom of the pumpkin pulling back through the top. Pull tight to squish the pumpkin down a bit. Repeat doing this until all the sections are divided. Secure to the bottom with a knot.
Then, hot glue a piece of wood for the stem and add any other decorations you would like.
I really hope you enjoy this loopy little crochet pumpkin pattern. I would love to hear what you think of it. Leave me a comment, or share a photo on Instagram so I can see your work. Don’t forget to tag me!