Beginner Crochet Course
Welcome to the Free Beginner Crochet Course!
I’m so glad you’re here! Whether you’ve never picked up a hook before or you’ve tried and felt frustrated, this course is designed just for you. Together, we’ll take things one gentle step at a time – with clear videos, printable guides, and plenty of encouragement along the way. By the end, you’ll feel confident holding your yarn, creating stitches, and even finishing your very first project. Let’s turn confusion into creativity and help you fall in love with crochet!
Stay Motivated with Your Progress Tracker!
Learning to crochet is a journey, one stitch at a time. To help you stay organized and celebrate how far you’ve come, I’ve created a printable Course Progress Tracker just for you. Use it to check off each lesson as you complete it. It’s your personal crochet roadmap – download it below and keep it close as you grow your skills with confidence and joy!
📃Download: Beginner Crochet Course Lesson Tracker (PDF)
💫 Jump Back In Anytime
Use the links below to jump straight to the lesson you left off on, or revisit any topic you want to practice again. Pick up your hook, and let’s keep going one stitch at a time!
Lesson 1: The Basics of Crochet
Welcome to your crochet journey!
Whether you’re brand new to crocheting or picking it up again after some time away, you’re in the right place. This first lesson is all about getting cozy with the tools, materials, and language of crochet, so you feel confident and ready to begin creating something beautiful.
✨ What You’ll Learn in This Lesson:
By the end of this lesson, you’ll be able to:
- Identify the basic tools and supplies used in crochet
- Understand yarn labels, weights, and dye lots
- Read crochet terminology and abbreviations (US vs. UK)
- Learn the importance of tension and gauge
- Recognize the right and wrong sides of crochet fabric
- Take your first steps with confidence 💪
Let’s get started!
🧰 Crochet Tools: What You Need (and Why)
Before we begin stitching, let’s get familiar with the basic tools of the trade:
- Crochet Hooks: These come in different sizes and styles. For beginners, we recommend starting with a size H/5.0mm aluminum or ergonomic hook.
- Yarn: A medium-weight (#4) yarn in a light solid color is ideal – it helps you see your stitches clearly.
- Extras: Scissors, a tapestry needle for weaving in ends, and stitch markers (you can even use a paperclip!).
📃Download: Beginner’s Crochet Toolkit (PDF)
🎉 You’re Ready to Shop Like a Maker!
You don’t need to know everything to get started. The most important thing is to feel comfortable and excited. Think of this as a beginner painter choosing their first brush – it’s just the start of your creative adventure. 🧡
🧺 Want a Little Help?
If you’d like a ready-made shopping list with links to my favorite tools, check out the Beginner Toolkit Guide I put together just for you.
🧵 How to Read a Yarn Label
Yarn labels are full of helpful information, like:
- Weight (how thick the yarn is)
- Yarn Fiber (what the yarn is made of)
- Amount of Yarn
- Recommended hook size
- Yarn Color Name & Dye Lot (make sure you use yarn from the same lot for color consistency!)
- Care Instructions
📸 Swipe through our sample yarn label graphic below to see what each symbol means.
🎥 Watch: Reading a Yarn Label – Quick Tutorial
📐 Tension & Gauge (Don’t Stress!)
Gauge might sound technical, but it’s really about how tight or loose your stitches are. It can affect the size and feel of your finished piece.
👀 Compare:
- Too tight: Stiff fabric, hard to work into.
- Just right: Smooth, flexible stitches.
- Too loose: Gaps in fabric, less structure.
🧶 Practice Prompt: Try making a 4×4″ swatch of single crochet using your yarn label’s recommended hook. Does it match the suggested gauge? If not, try adjusting your hook size.
🎥 Watch: How to Measure Your Crochet Gauge
📘 Crochet Terms & Abbreviations
Crochet patterns use abbreviations like:
- ch = chain
- sc = single crochet
- dc = double crochet
🌍 Important: The US and UK use different terms for the same stitches! We use US terms throughout this course.
📄 Download: Crochet Abbreviation Cheat Sheet (PDF)
👀 Right Side vs. Wrong Side of Crochet
The right side is usually the side that faces out on your finished piece. The wrong side is the back. Some stitches look very similar on both sides – others don’t!
🧶 Visual tip: The tail from your slip knot will usually fall on the left when the right side is facing you.
Right Side
Front
Wrong Side
Back
🧶 Mini Challenge: Your First Crochet Prep Task!
You’re doing amazing so far. Here’s a simple way to practice what you’ve learned:
✅ Gather your tools and yarn
✅ Choose a size H/5.0 mm hook and medium-weight yarn
✅ Make a small swatch of single crochet (I’ll show you how in the next few lessons!)
✅ Measure your swatch and note how it feels
🎉 Celebrate! You’ve completed Lesson 1. You’re already becoming a maker.
💬 Need Help?
If you’re unsure about any part of this lesson, pop over to the Beginner FAQ page or reach out via email – we’re here for you. And don’t forget to share your progress using #LoopedKnottedBeginners!
Lesson 2: Essentials of Crochet
You’ve learned the basics, now we’ll take a look at the essentials of crochet. In this lesson, we’ll walk through the core crochet stitches, starting with the slip stitch and working our way up to taller, textured stitches. Don’t worry – you’ll get the hang of it in no time.
✨ What You’ll Learn in This Lesson:
By the end of this lesson, you’ll be able to:
- Crochet the four most common stitches: single, half-double, double, and treble crochet
- Understand the anatomy of a crochet stitch (hello, front loop and back loop!)
- Use stitch markers like a pro
- Recognize and practice reading basic stitch patterns
You can take this one stitch at a time. There’s no rush – we’re here to build your confidence and rhythm.
🧶 Crochet Stitch Progression: From Short to Tall
Crochet stitches vary in height. Think of them like steps on a ladder – the taller the stitch, the more texture and flexibility you’ll get.
Stitch | Abbreviation | Number of Loops | Height |
Slip Stitch Single Crochet Half-Double Crochet Double Crochet Treble/Triple Crochet | sl st sc hdc dc tr | 0 (just pull through) 2 loops 3 loops 3 loops 4 loops | very short short medium tall tallest |
Slip Stitch
Single Crochet
Half-Double Crochet
Double Crochet
Treble/Triple Crochet
🧷 Stitch Markers: Your New Best Friend
Stitch markers are lifesavers for beginners! They help you:
- Mark the first or last stitch of a row
- Keep track of your rounds in circular projects
- Highlight pattern repeats
- You can use:
- Plastic or metal locking markers
- Safety pins
- Even a scrap piece of yarn in a contrasting color
🎥 Watch: How to Use Stitch Markers
📄 Download: Stitch Marker Quick Guide (PDF)
💡 Tip: Use one at the start of every row for perfectly straight edges.
🧠 Crochet Stitch Anatomy: Let’s Look Closer
When you look at a crochet stitch from the top, you’ll see a V shape. That V is made up of:
- Front loop (closest to you)
- Back loop (farthest from you)
- Post (the vertical part of the stitch)
You’ll sometimes crochet into just the front loop or back loop to create texture.
📸 Explore the diagram below!
📄 Download: Stitch Anatomy Cheat Sheet (PDF)
📘 Reading a Stitch Pattern
Here’s a sample beginner row:
Row 1: Ch 10. Sc in 2nd ch from hook and in each ch across. (9 sts)
This means:
- You chain 10 to begin.
- You skip the first chain and insert your hook into the second one.
- You single crochet across all remaining stitches, ending with 9 stitches total.
🧶 Skill-Building Practice
Let’s pull it all together with a fun, low-pressure challenge!
🧪 Mini Practice Grid:
Stitch Row | Count | Notes |
Slip Stitch Single Crochet Half-Double Double Crochet Treble Crochet | 10 10 10 10 10 | Practice relaxed tension Feel the structure Notice the stretch Watch it grow taller Enjoy the airy feel |
📄 Download: Practice Grid Worksheet (Printable)
🎉 Celebrate Your Progress
You’ve officially learned the five foundational stitches of crochet! These will form the building blocks of nearly every pattern you ever try – from scarves to sweaters to stuffed animals.
💬 Got Questions?
If any of these stitches feel tricky at first, that’s okay. Repetition builds muscle memory. Rewatch the videos, revisit the diagrams, and reach out if you need help. You’re doing an incredible job – keep going!
Lesson 3: How to Hold the Yarn and Hook
Let’s find your rhythm.
There’s no one right way to hold your crochet hook and yarn – only the way that feels good in your hands. This lesson is all about helping you discover your most natural grip and tension style so your stitches flow smoothly.
It might feel awkward at first (like learning to write again!), but with a little practice, your hands will find their groove. Promise.
✨ What You’ll Learn in This Lesson:
- By the end of this lesson, you’ll be able to:
- Try different ways to hold your crochet hook and yarn
- Understand yarn tension and how it affects your stitches
- Adjust your grip to stay relaxed and in control
- Begin stitching with more consistency and confidence
Take a deep breath, shake out your hands, and let’s ease into it. 💖
🖐 How to Hold the Crochet Hook
There are two main styles of holding the hook. Try both and see which one feels more natural for you.
✏️ Pencil Grip
Hold the hook like a pencil, with your thumb and index finger gripping near the flat part and the hook tip pointing downward.
🔪 Knife Grip
Hold the hook like a dinner knife, resting the flat part on top of your index finger, with your thumb beneath.
Try Both Grips.
Pencil Grip
Knife Grip
Left-Hand
Right-Hand
Left-Hand
Right-Hand
💡 Tip: There’s no wrong grip. What matters most is comfort and control.
🧶 How to Hold the Yarn
Yarn tension helps you control the flow of yarn as you crochet – like feeding it smoothly into your stitches without too much slack or tightness.
Basic Yarn Hold:
- Let the yarn rest over your pinky.
- Wrap it under your ring and middle fingers.
- Bring it over your index finger to guide the yarn into each stitch.
Your non-dominant hand will hold and guide the yarn.
📸 See photo tutorial below.
Right-Handed
If you are right-handed, hold the hook in your right hand and the yarn in your left.
Left-Handed
If you are a leftie you hold the hook in your left hand and the yarn in your right.
💡 Tip: Don’t strangle your fingers! Keep it loose and adjust as needed.
⚖️ Tension: Not Too Tight, Not Too Loose
Think of yarn tension like the Goldilocks rule:
- Too tight = hard to insert your hook and painful hands 😬
- Too loose = floppy, uneven stitches 😕
- Just right = easy to pull through, stitches look neat 😄
Practice Prompt:
- Chain 15 stitches with your usual grip.
- Then chain 15 more intentionally tighter, and another 15 intentionally looser.
- Compare them – notice how they feel and look different?
💡 Tip: Tension takes time to develop. Be kind to your hands!
🤲 Mini Hand Stretches for Crochet Comfort
Take care of your hands – they’re doing something new and brave!
- Quick Stretches:
- Roll your wrists in circles
- Gently pull back on each finger
- Massage your palm with your thumb
⏱ Try stretching every 20 minutes of crocheting to stay comfy.
🎉 Celebrate Your Progress
Even if your chains are uneven right now – you’re learning a brand-new skill! Every stitch brings you closer to mastery. Be proud of how far you’ve come.
💬 Need Help?
Feeling awkward? That’s normal. Learning how to hold the yarn and hook takes patience. Try out different holds, and don’t hesitate to reach out for support.
Your hands are learning something wonderful. Keep going – you’ve got this. 💕
Lesson 4: How to Make a Slip Knot and Chain Stitch
Your very first stitches – let’s do this together!
Welcome to the moment where your yarn turns into your very first piece of crochet. In this lesson, we’ll start with two essential skills: making a slip knot and creating a chain stitch (ch). These two techniques are the gateway to every project you’ll ever make.
And don’t worry if it feels tricky at first – every crocheter started right here. We’re going step-by-step, together.
✨ What You’ll Learn in This Lesson:
By the end of this lesson, you’ll be able to:
- Make a slip knot (your crochet starting point)
- Create a smooth, even chain of stitches
- Count your chain stitches confidently
- Practice proper yarn tension while chaining
Let’s jump in – your maker journey officially begins now. 🎉
🔁 Step 1: Make a Slip Knot
A slip knot secures the yarn to your hook and starts your crochet journey. You’ll use this knot to begin almost every project.
How to Make a Slip Knot:
- Hold the yarn tail in your left hand.
- Wrap the working yarn (connected to the ball) over to form a loop.
- Insert your fingers through the loop, pull up a bit of working yarn to make a new loop.
- Slip that loop onto your crochet hook and gently tighten.
🎥 Watch: How to Make a Slip Knot (Video)
📸 Follow along with the step-by-step photos below.
💡 Tip: Your loop should be snug around the hook, but not too tight. It should glide easily when you crochet.
🔗 Step 2: Make a Chain Stitch (ch)
The chain stitch is the foundation of almost every crochet project. Think of it like laying down the “road” your stitches will travel on.
How to Make a Chain Stitch:
- Hold the hook in your dominant hand.
- Use your other hand to keep light tension on the yarn.
- Yarn over (wrap the yarn over the hook from back to front).
- Pull the yarn through the loop already on your hook.
You’ve made one chain stitch! Keep going to make a chain.
🎥 Watch: How to Crochet a Chain Stitch
🧶 Try chaining 10–15 stitches at first, just to get the hang of it.
🔢 How to Count Your Chains
Each chain looks like a little “V” shape. The very first slip knot doesn’t count as a chain stitch.
To count your chains:
- Start with the first full “V” after the slip knot.
- Each “V” is one chain.
Count carefully, especially when patterns ask for a specific number.
📸 Refer to the photo below: Count the “V”s across your chain.
💡 Tip: It’s easy to miscount at first – use a stitch marker every 10 chains to help keep track!
⚖️ Chain Tension Practice
Your chain stitches should be:
- Loose enough to easily insert your hook
- Even in size (or close to it!)
- Not so tight that they curl or pinch
Practice Challenge:
- Make a chain of 20 stitches.
- Compare your first 10 to your last 10. Are they more even now?
- Try making one chain too tight, then too loose, then just right.
📄 Download: Chain Stitch Practice Sheet (PDF)
💡 Tip: If chaining hurts your hands, pause and do a quick hand stretch!
📸 Snap a photo and tag it with #LoopedKnottedFirstChain to share!
🎉 Celebrate Your Progress
You just learned the slip knot and chain stitch – your very first crochet techniques. This is huge! You now have the foundation to build anything: scarves, blankets, bags… it all starts here. You’ve got this – and we’re only just beginning. 💖
💬 Questions or Wobbly Chains?
If your chain is uneven or twisty, you’re not alone. That’s completely normal for beginners. Keep practicing and rewatching the videos – your hands will remember with time.
Need help? Just reach out or pop into our FAQ page. I’m cheering you on every step of the way!
Lesson 5: How to Single Crochet (sc)
Your first real row of crochet – let’s go!
Now that you’ve practiced the chain stitch, you’re ready to start building rows. In this lesson, you’ll learn the single crochet stitch – the simplest of the four main stitches and the foundation for many beginner-friendly projects.
Single crochet creates a dense, neat fabric perfect for scarves, coasters, dishcloths, and more. This is where the magic begins!
What You’ll Learn in This Lesson:
By the end of this lesson, you’ll be able to:
- Make the single crochet stitch (abbreviated sc)
- Turn your work and crochet back across a row
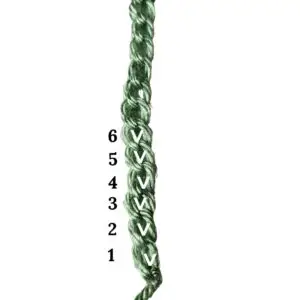
- Count your stitches accurately
- Build a small swatch of single crochet
We’ll go slowly, with plenty of video and photo support. You’ve got this.
What is Single Crochet?
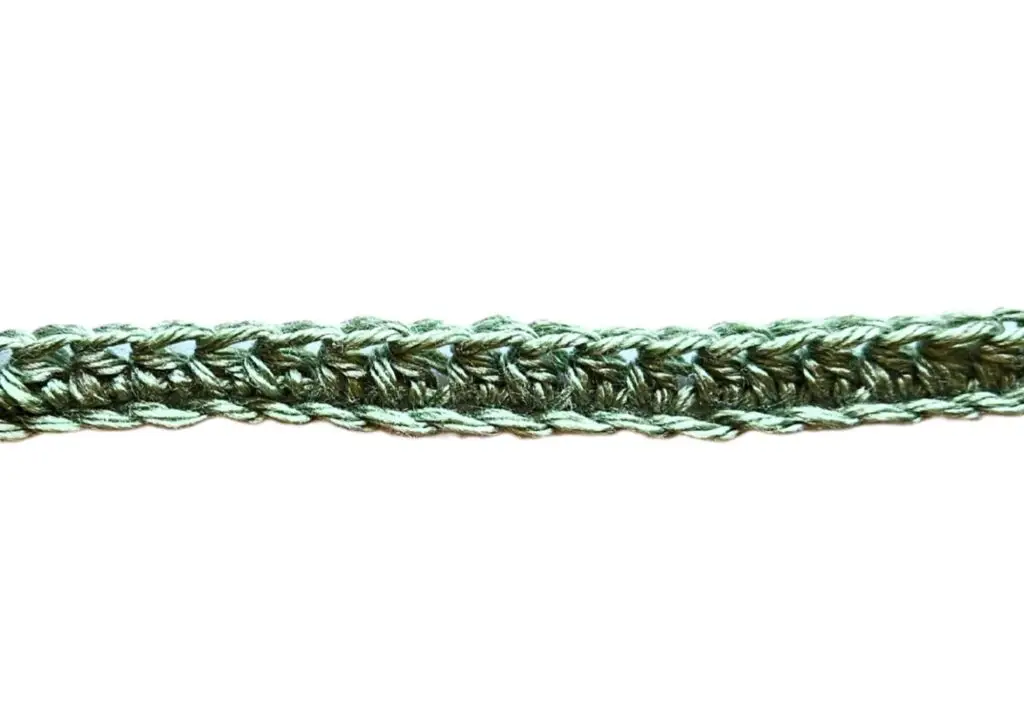
The single crochet stitch is short, strong, and simple. It’s great for sturdy fabrics and gives your project a clean look.
In patterns, it’s written as:
- sc = single crochet
Step-by-Step: How to Single Crochet (sc)
Let’s walk through it one step at a time.
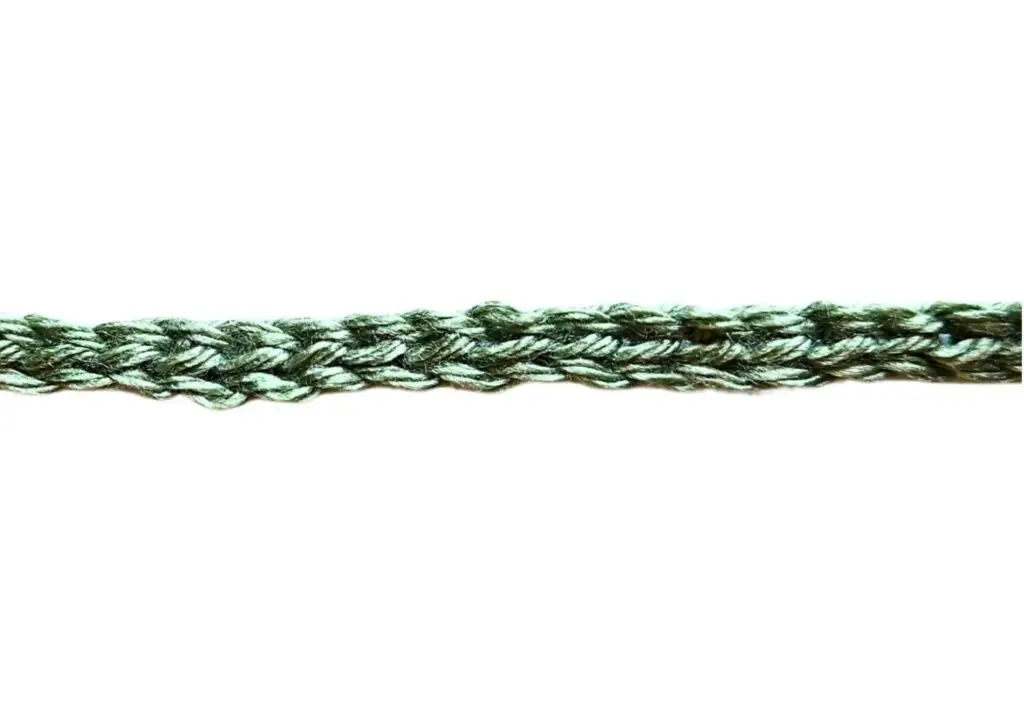
- Start with a Foundation Chain:
- Make a chain of 15 stitches.
You’ll work 14 single crochets (the extra chain is for turning—more on that in a moment!).
Row 1:
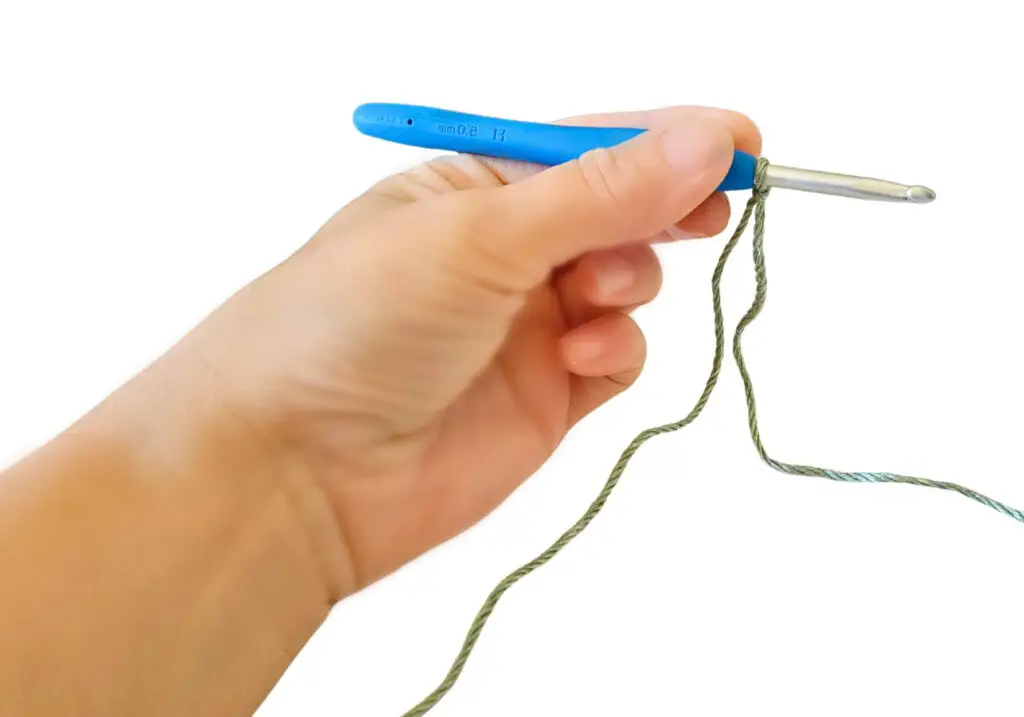
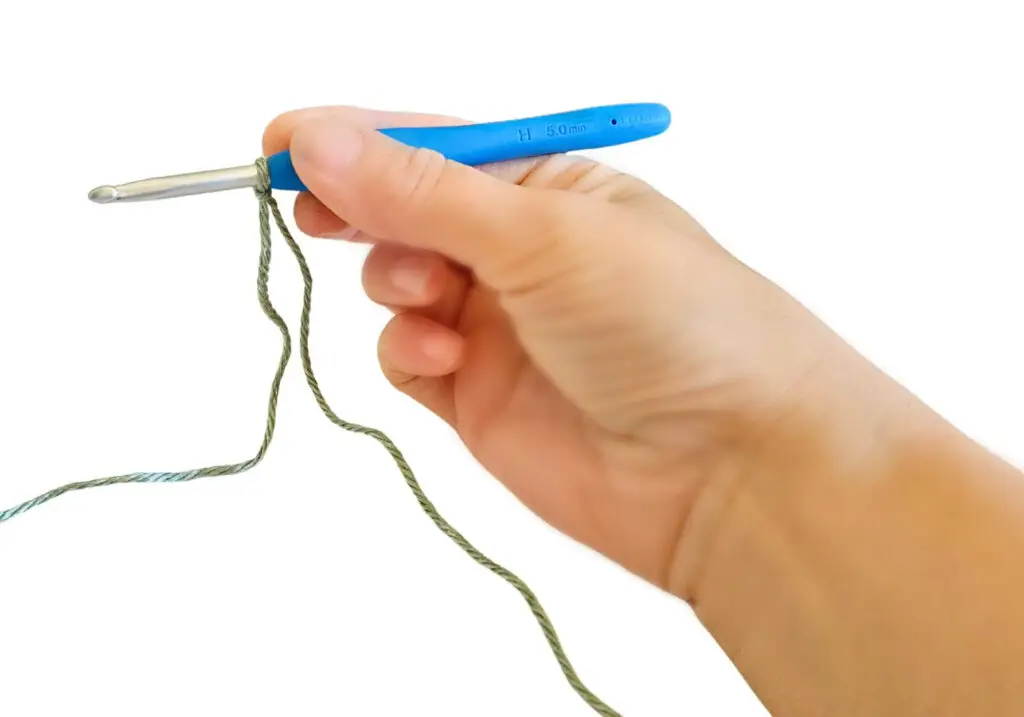
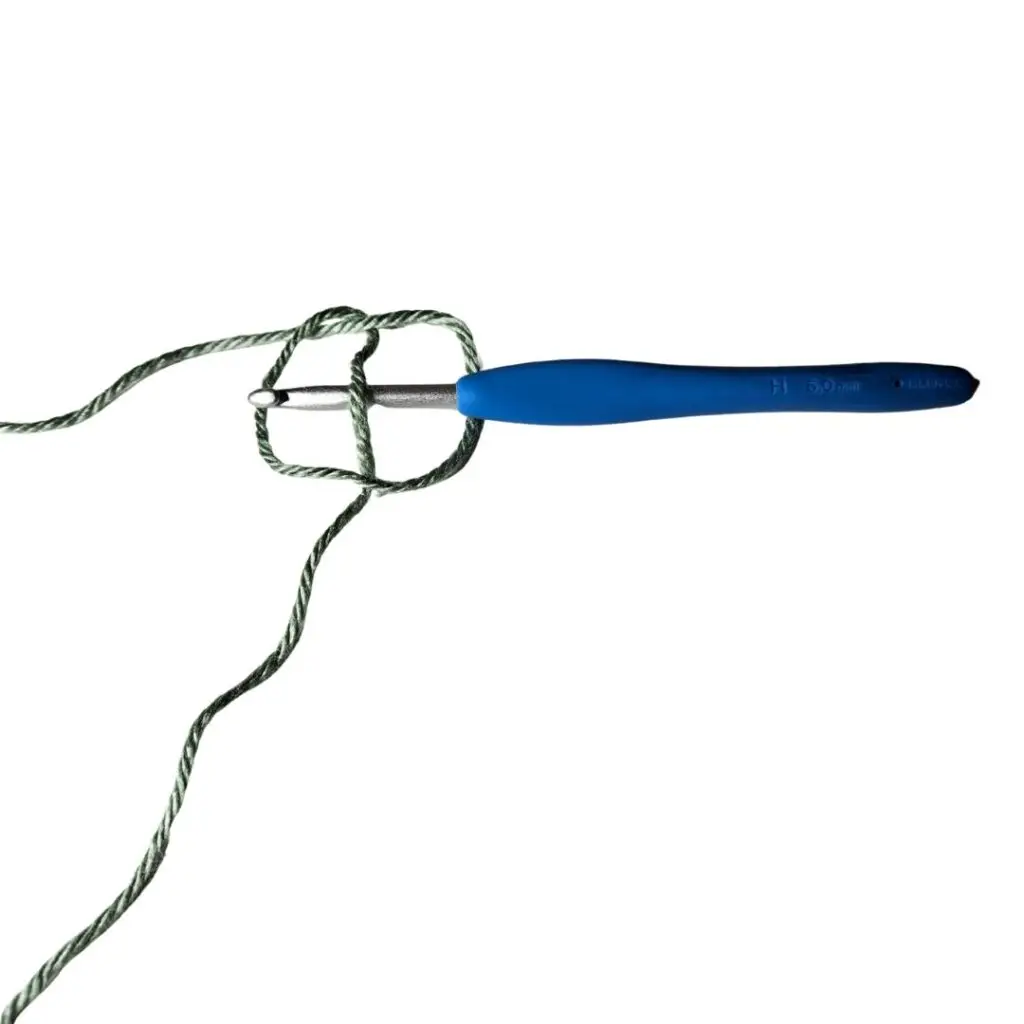
- Insert your hook into the second chain from the hook.
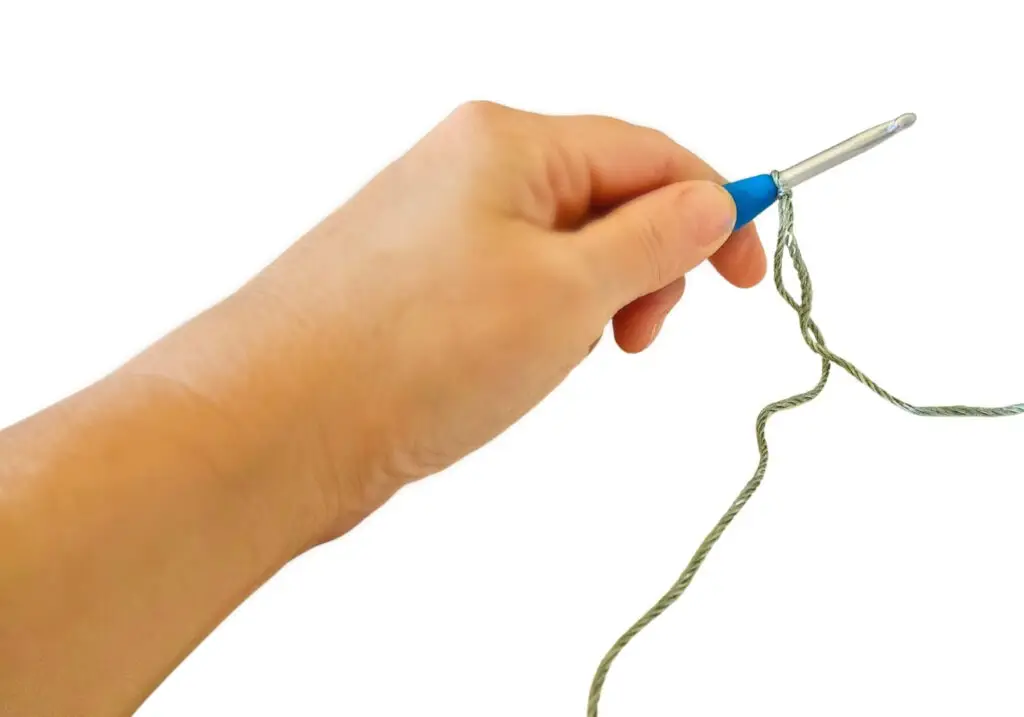
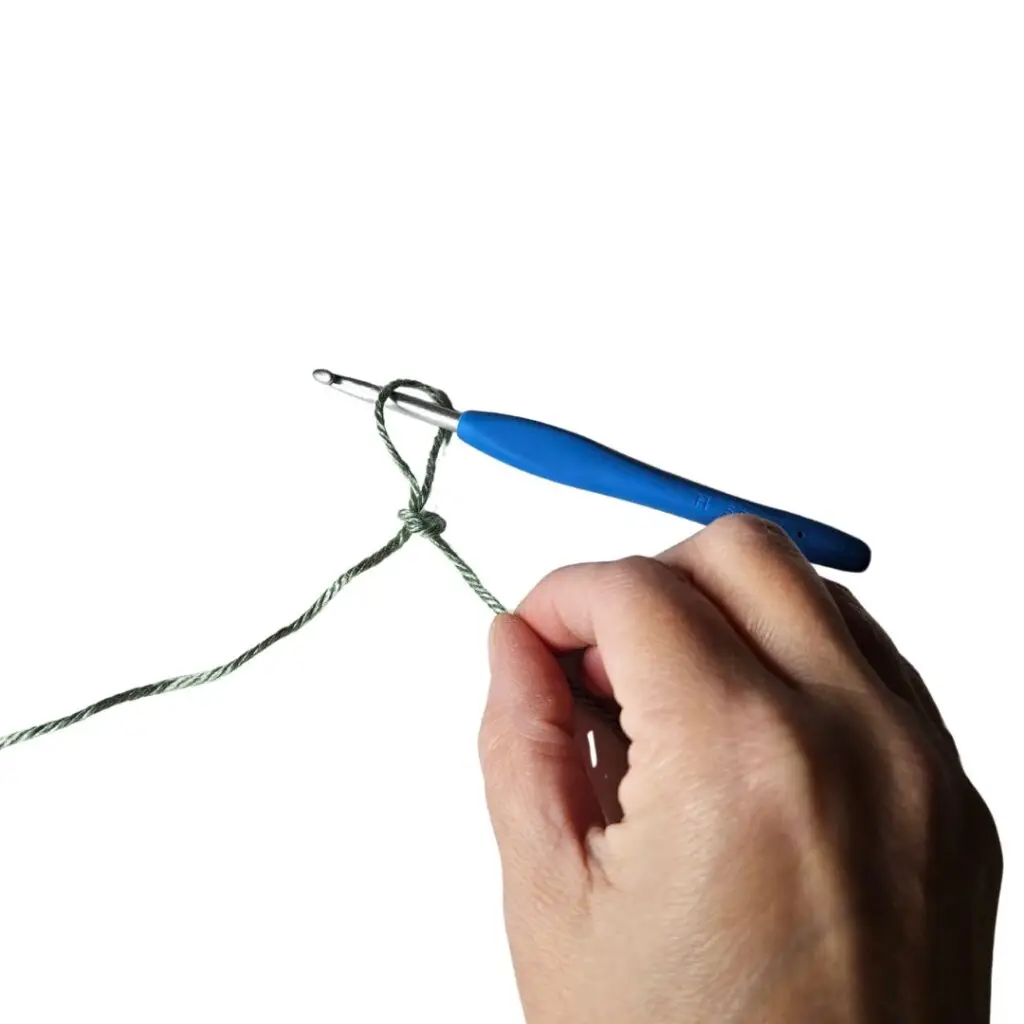
- Yarn over and pull up a loop (you now have 2 loops on your hook).
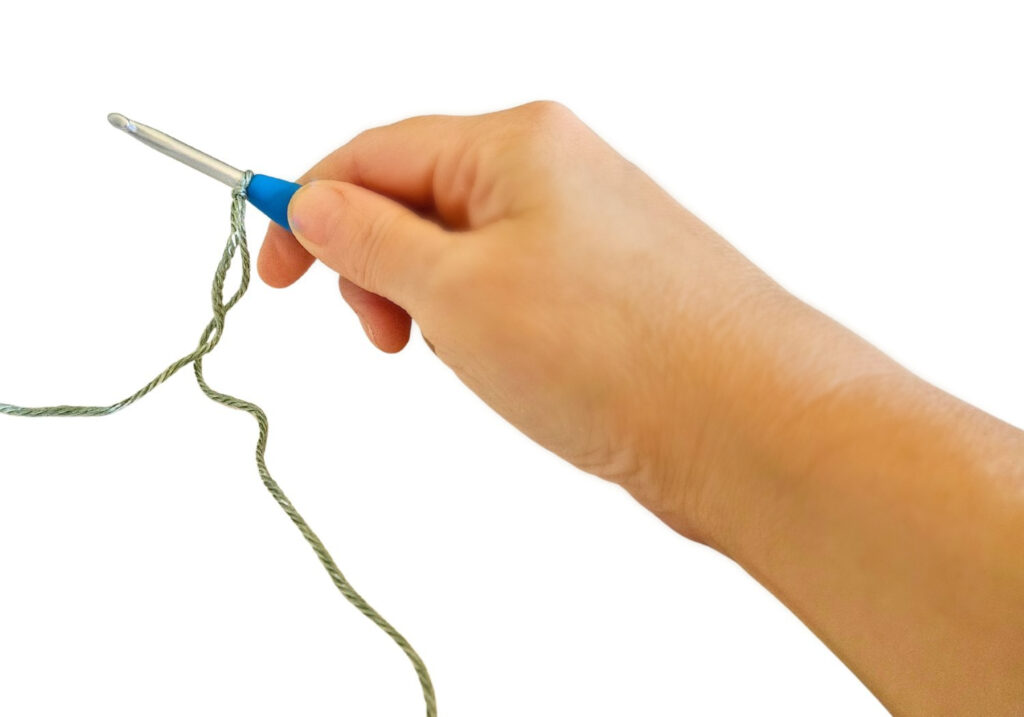
- Yarn over again and pull through both loops.
That’s your first single crochet!
Repeat this process across the entire row—10 stitches total.
Watch: How to Single Crochet (Step-by-Step Video)
💡 Tip: Count out loud as you stitch to stay on track. Don’t worry if it looks wonky at first!
🎉 Celebrate Your Progress
You just learned your first real stitch and built your first row! This is a huge milestone in your crochet journey.
📸 Share your swatch with us using #LoopedKnottedFirstStitch so we can cheer you on!
💬 Have Questions?
If your row looks uneven or you’re unsure if you’re doing it right, that’s totally normal. You’re learning something new, and your hands are adjusting. Rewatch the video, count carefully, and give yourself grace.
You’re not just making stitches – you’re building confidence. 💖
Lesson 6: How to Turn and Work in Rows
It’s time to build on your stitches – one row at a time.
You’ve already made a slip knot, chained, and practiced the single crochet. That means you’re ready for the next step: turning your work and crocheting more rows.
In this lesson, we’ll slow it down and focus on how to turn and continue stitching across, so your work grows into a fabric – like magic, one row at a time.
✨ What You’ll Learn in This Lesson:
By the end of this lesson, you’ll know how to:
- Turn your crochet project at the end of a row
- Understand and use the “turning chain”
- Maintain even edges as your rows stack up
- Keep your stitch count consistent
Let’s get your hands moving and your confidence growing. 🌱
🔁 What Does “Turn Your Work” Mean?
Turning your work simply means flipping your piece over so you can keep crocheting in the opposite direction.
At the end of each row, you’ll:
- Flip your work from right to left
- Chain 1 (this is your turning chain)
- Begin stitching in the first stitch of the new row
What Is a Turning Chain?
A turning chain gives your new row the height it needs to start. For single crochet, that’s 1 chain.
Think of it like a tiny “step up” that gets you to the right level for your next row.
Turning chains do not usually count as stitches when working in single crochet (unless a pattern says otherwise).
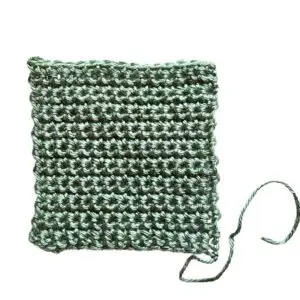
Practice: Building Rows With Single Crochet
Let’s combine your skills and work a few full rows, turning after each one.
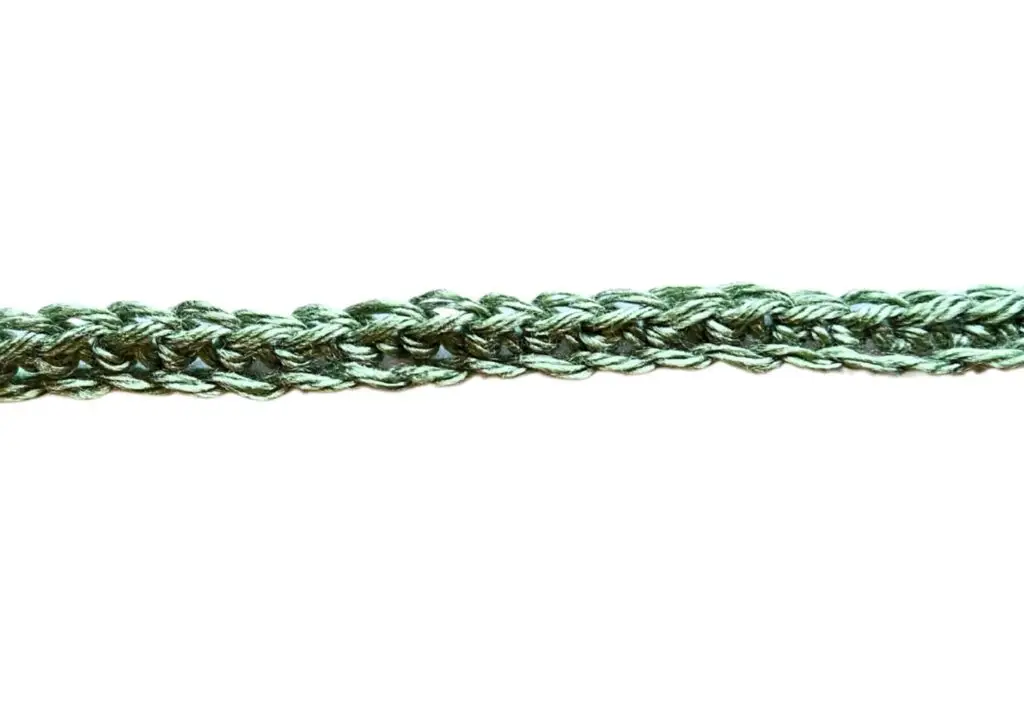
Practice Pattern:
- Ch 11
- Row 1: sc in 2nd ch from hook, sc across (10 sc)
- Ch 1, turn
- Row 2: sc in each stitch across (10 sc)
- Repeat row 2 for 5–6 rows
Download: Practice (sc) Swatch Pattern
Watch Along: Turn and Work in Rows Demo
💡 Tip: Always turn your work in the same direction each time, pick right-to-left or left-to-right and stick with it to keep your yarn from tangling.
💡 Tip: Count after every row at first. Stitch markers in the first and last stitch of each row can help you stay on track.
📏 How to Keep Your Edges Straight
Uneven or jagged edges are super common for beginners – and totally fixable.
Common Issues:
Problem | Fix |
Skipped a stitch at the end | Double-check you’re inserting into the last real stitch (not the turning chain) |
Accidentally added a stitch | Make sure you’re not working into the side of the turning chain |
Unsure where the first stitch is | Use a stitch marker in the first stitch of every row |
💡 Tip: Run your finger along the top of the row to feel the “V” stitches – they’ll help you count more easily than sight alone.
💬 How Many Rows Should I Practice?
As many as you like! Try 6, 8, or even 10 rows to start seeing your progress. The more you practice turning and counting, the more natural it will feel.
Consider turning this practice into:
- A bookmark
- A mini washcloth
- A tension tester for future projects
📸 Snap a photo of your mini rectangle and tag it with #LoopedKnottedRows so we can celebrate with you!
🎉 Celebrate Your Progress
You’re now officially building rows – this is a big leap from making a chain. You’re laying the foundation for real projects, one stitch at a time.
Remember: Every crocheted masterpiece starts with a few slightly wobbly rows. Keep practicing, and your edges will smooth out with time and care.
💬 Need Some Encouragement?
If turning feels awkward or you’re not sure where to insert your hook, take a breath. Rewatch the demo, count out loud, or message for help – you’re doing something new, and that takes courage.
You’re not just learning to crochet – you’re learning to trust yourself as a maker. 🧡
Lesson 7: How to Fasten Off and Weave in Ends
Finish strong – your first crochet swatch is complete!
You’ve made rows. You’ve counted stitches. You’ve turned your work like a pro. And now – it’s time to finish your very first crochet piece!
In this lesson, you’ll learn how to fasten off (that means securing your last stitch) and how to weave in your yarn tails, so your work looks neat and holds up over time.
You’re not just learning techniques here – you’re practicing completion. That’s worth celebrating. 🎉
✨ What You’ll Learn in This Lesson:
By the end of this lesson, you’ll be able to:
- Fasten off your crochet work neatly and securely
- Weave in yarn tails so they don’t unravel
- Use a yarn needle with ease
- Finish your practice swatch with pride
Let’s tidy up your hard work and prepare it for display, use, or your memory box. 💖
🧵 Step 1: How to Fasten Off
“Fastening off” means cutting your yarn and tying off the final stitch so it doesn’t come undone.
Here’s How:
- After your last stitch, chain 1.
- Cut the yarn, leaving a 6-inch tail.
- Pull the cut end all the way through the loop on your hook.
- Gently tug to tighten—your stitch is now locked in place.
🎥 Watch: How to Fasten Off (Video)
💡 Tip: Leave a tail long enough to weave in (at least 6 inches), especially for future projects.
🪡 Step 2: Weaving in Your Ends
Weaving in your yarn tails keeps your work looking tidy – and makes sure it doesn’t unravel.
You’ll Need:
- A yarn needle (aka tapestry needle)
- Your yarn tail
How to Weave In:
- Thread the tail onto your yarn needle.
- Weave it through the top loops of 3–5 stitches, going in one direction.
- Turn your piece and weave it back the other way for extra security.
- Trim the excess yarn close to the surface.
🎥 Watch: How to Weave in Ends (Video)
📄 Download: Weaving-In Guide (PDF)
💡 Tip: Try to hide your tail in stitches of the same color – it blends better and looks polished.
✂️ Don’t Have a Yarn Needle?
No worries! You can:
- Use a bobby pin or hairpin in a pinch
- Crochet over your tail (if your pattern allows)
- Leave the tail visible if it’s just a practice swatch
🧼 Bonus: Make It Neat (Optional)
Want your swatch to lay flat and look clean?
Try blocking it:
- Lightly mist it with water or steam
- Gently stretch it to even out edges
- Let it dry flat on a towel or blocking board
📄 Download: Quick Blocking Tips (PDF)
💡 *Totally optional – but it’s a nice touch if you’re framing or gifting your first swatch!
🎉 You Finished Your First Crochet Piece!
Take a moment to hold your swatch and really appreciate what you just did.
You:
- Made a slip knot
- Chained
- Worked single crochet
- Built rows
- Turned your work
- Fastened off
- Wove in ends
🌟 That’s an entire crochet project from start to finish!
📸 Snap a photo and tag it with #LoopedKnottedSwatch so we can celebrate with you.
💬 Feel a Little Proud? – You Should!
Even if your stitches aren’t perfect (no one’s are at first!), you’ve made something real with your hands – and that’s powerful. This swatch is proof that you’re learning, growing, and creating.
Keep it. Frame it. Or stash it away for when you need a reminder that you can do hard things. 💕
Lesson 8: Let’s Crochet a Washcloth
Make something useful – with just one stitch!
You’ve practiced the basics, built rows, and fastened off like a pro. Now it’s time to put your new skills to work by making your very first crochet project: a simple, squishy washcloth.
This project is beginner-friendly, relaxing, and surprisingly satisfying. It’s a wonderful way to build your confidence while creating something you can actually use (or gift!).
✨ What You’ll Learn in This Lesson:
By the end of this lesson, you’ll:
- Start and finish your first full project
- Practice working with even tension and straight edges
- Build muscle memory for single crochet
- Feel the joy of making something real with your hands
You only need one stitch to make this project – single crochet, so it’s perfect for beginners. Let’s get started!
🧺 What You’ll Need:
✔ Worsted weight (medium #4) yarn – cotton is great for washcloths
✔ 5.0 mm (H-8) or 5.5 mm (I-9) crochet hook
✔ Yarn needle
✔ Scissors
✔ Stitch marker (optional)
✔ A little patience and a lot of grace 💛
📄 Download: Washcloth Pattern PDF
🎥 Watch: Step-by-Step Washcloth Video
Right-Hand
Left-Hand
📋 The Pattern: Simple Single Crochet Washcloth
This is an easy 2-row repeat using only the single crochet stitch.
🧶 Pattern Instructions:
- Ch. 31 (or adjust based on how wide you want your washcloth)
- Row 1: sc in 2nd ch from hook, sc in each chain across (30)
- Ch 1, turn
- Row 2: sc in each st across (30)
- Repeat Row 2 until your piece is a square – about 30 rows
- Fasten off, weave in ends
🎉 That’s it! You just made a washcloth!
💡 Tip: Use a stitch marker in the first stitch of each row to keep your edges even while you build confidence.
🔁 Want to Add a Border? (Optional)
If you’d like to give your washcloth a polished look, try adding a simple single crochet border all the way around.
After finishing your last row, do not fasten off.
Ch 1, then sc evenly along the sides, placing 3 sc in each corner.
Join with a slip stitch to the first sc, then fasten off and weave in your ends.
💡 Optional but fun! Borders are great practice for more advanced projects later.
🎁 What to Do With Your Washcloth
You can:
- Use it in your own bathroom or kitchen
- Gift it with a handmade soap and ribbon
- Keep it as a memento of your first finished project
- Make a matching set in different colors
📸 Show it off! Post a photo with the hashtag #LoopedKnottedFirstProject so we can cheer you on!
💬 What If It’s Not Perfect?
It doesn’t have to be. Your stitches might be tight in some rows and looser in others. Your edges might wobble a little. That’s normal – and part of the beauty of handmade work.
Every stitch you make tells the story of your learning. This washcloth is proof that you stuck with it and made something with your own two hands.
So take a deep breath. Be proud. You’re a maker now. 🧡
🎉 You Did It!
You’ve completed your first full crochet project – from slip knot to final stitch. That’s a huge achievement, and I hope you feel proud every time you use or look at your washcloth.
Coming up next: Let’s learn about patterns, so you can start exploring even more projects with confidence!
Lesson 9: How to Read a Written Crochet Pattern
Decode the language of crochet and unlock endless projects.
Crochet patterns can look a little confusing at first – almost like a secret code. But don’t worry! Once you learn the basic abbreviations and how a pattern is structured, you’ll be able to follow along like a pro.
This lesson will help you feel comfortable reading patterns so you can move from beginner swatches to beautiful, finished projects with confidence.
✨ What You’ll Learn in This Lesson:
By the end of this lesson, you’ll:
- Recognize common crochet pattern terms and abbreviations
- Understand pattern formatting and structure
- Know how to follow written instructions step-by-step
- Feel confident choosing and starting beginner-friendly patterns
You’ve already learned the techniques – now let’s learn how to read them in pattern form!
🧾 What Is a Crochet Pattern?
A crochet pattern is like a recipe – it gives you the materials, steps, and special instructions needed to create a project from start to finish.
Most patterns include:
- Materials list – what yarn, hook size, and tools to use
- Gauge – helps ensure the size comes out right
- Abbreviations key – explains shorthand terms
- Pattern instructions – step-by-step rows or rounds
📄 Download: Pattern Reading Starter Guide (PDF)
✨Crochet Abbreviations Common
Patterns use abbreviations to keep things short and readable. Here are a few you’ve already used:
Abbreviation | What It Means |
ch | chain |
sc | single crochet |
st(s) | stitch(es) |
sl st | slip stitch |
sk | skip |
rep | repeat |
tog | together (decrease) |
💡 Tip: Don’t memorize them all at once. Just keep a cheat sheet handy while you learn.
🧶 Sample Beginner Pattern (With Translation!)
Let’s look at a simple line from a written pattern:
- Row 2: Ch 1, turn. Sc in each st across. (20 sc)
Let’s break it down:
- Ch 1 = make 1 chain stitch (your turning chain)
- Turn = flip your work
- Sc in each st across = single crochet in every stitch from the previous row
- (20 sc) = when you’re done, you should have 20 stitches
🎥 Watch: How to Read a Pattern Row by Row (Video)
🔁 What Do Brackets and Asterisks Mean?
You might see symbols like * and [ ] in more complex patterns – they’re there to show repeats.
Example:
Row 4: [Sc in next 2 sts, ch 1, sk 1] rep across.
Translation:
Do everything inside the brackets
Then repeat it again and again until the end of the row
How to Practice Pattern Reading
- Grab the washcloth pattern from Lesson 8
- Read each line slowly
- Say the abbreviations out loud (“chain one, turn, single crochet across”)
- Follow along with your hook and yarn
Tip: Use highlighters or sticky notes to mark your rows as you go!
Don’t Stress If You Forget
You don’t need to memorize every abbreviation. Pattern reading is a skill that gets easier the more you do it—just like driving or cooking.
You can always:
- Check the pattern’s abbreviation key
- Look at your cheat sheet
- Rewatch a video to refresh your memory
This isn’t a test—it’s just another way to help you make something beautiful.
You’re Pattern-Literate!
You now know how to:
- Read a pattern line by line
- Understand common crochet abbreviations
- Follow a beginner pattern with confidence
Share your favorite beginner pattern find with the hashtag #LoopedKnottedReadsPatterns
Need Help With a Pattern?
If you’re stuck or confused by a new pattern, don’t give up. Snap a photo or copy the line and ask for help – there’s a whole community of makers who’ve been there and are happy to support you.
You’re unlocking a whole new world of creative possibilities.
Lesson 10: How to Half Double Crochet (hdc)
Add height, texture, and versatility with this beginner-friendly stitch!
You’ve learned single and double crochet – now it’s time to meet the happy medium between the two: the half double crochet stitch.
It’s taller than a single crochet, shorter than a double crochet, and gives your work a beautiful, dense texture. It’s perfect for scarves, washcloths, baby blankets, and more!
Let’s break it down step by step so you can start stitching with confidence. 💛
✨ What You’ll Learn in This Lesson:
By the end of this lesson, you’ll:
- Understand how to make the half double crochet (hdc) stitch
- Learn how to identify hdc stitches in your work
- Practice your tension and stitch height
- Create a small hdc swatch you can turn into a coaster or mini washcloth
🧺 What You’ll Need:
✔ Worsted weight yarn
✔ 5.0 mm or 5.5 mm crochet hook
✔ Scissors
✔ Yarn needle
✔ Optional: stitch markers
📄 Download: Half Double Crochet Step-by-Step Guide (PDF)
🎥 Watch: How to Half Double Crochet (Video)
Right-Hand
Left-Hand
📏 What is Half Double Crochet?
The hdc stitch is a great middle-ground stitch:
- It creates a fabric that’s soft but not too open
- It works up faster than single crochet
- It adds texture without too much bulk
In patterns, it’s often abbreviated as hdc.
🔁 How to Make a Half Double Crochet (US Terms)
Let’s walk through it slowly:
- Yarn over (wrap the yarn over your hook)
- Insert hook into the next stitch
- Yarn over again, pull up a loop (3 loops on your hook)
- Yarn over one more time, pull through all 3 loops
🎉 That’s one hdc stitch!
🧶 Practice Pattern: HDC Swatch
Let’s make a small square using only half double crochet stitches.
Pattern:
- Ch 21
- Row 1: Hdc in the 2nd ch from hook, and in each ch across (20 hdc)
- Ch 1, turn
- Row 2–12: Hdc in each stitch across (20 hdc)
Fasten off and weave in ends
💡 Want to make it a washcloth? Add a single crochet border around the edge!
💡 Want to make it a coaster? Use cotton yarn and stitch loosely.
👀 How to Recognize HDC Stitches
Each hdc stitch has:
A “V” on the front (like other crochet stitches)
A little horizontal bar across the back – it’s great for texture!
You can even work into the 3rd loop of hdc stitches later for ribbing and faux knit looks!
💡 Where to Use (hdc) in Projects
Hdc is one of the most versatile beginner stitches. It’s great for:
- Washcloths and spa sets
- Baby blankets
- Beanies and headbands
- Pillow covers and placemats
- Scarves with drape and squish!
Try it in place of single or double crochet to see how the fabric changes!
🎉 You’ve Learned a New Stitch!
Adding the half double crochet to your toolbox gives you more control over the feel and style of your projects. It’s an easy, satisfying stitch that works up quickly – perfect for both practice and finished pieces!
📸 Share your swatch or finished project with the hashtag #LoopedKnottedHDC
Lesson 11: Let’s Crochet a Simple Scarf Using a Pattern
Your first wearable project – get ready to wrap yourself in handmade joy!
You’ve learned the stitches. You’ve read a pattern. And now you’re ready to make something you can actually wear – your very first scarf!
This simple scarf project uses just single crochet stitches and builds row by row. It’s a perfect way to build confidence while creating something cozy, practical, and beautiful.
Let’s take your skills to the next level – one stitch at a time.
What You’ll Learn in This Lesson:
By the end of this lesson, you’ll:
- Read and follow a complete beginner pattern
- Maintain even stitch tension and edges
- Create a scarf using only single crochet
- Practice consistency while watching your confidence grow
This is where your stitches come together into something you’ll be proud to wear or gift.
What You’ll Need:
Worsted weight yarn (4) – approx. 300 yards (try soft acrylic)
5.0 mm (H-8)
Yarn needle
Scissors
Measuring tape
Optional: stitch markers
Tip: Use a soft yarn that feels nice against your skin – cotton blends or acrylic are great options!
Download: Beginner Scarf Pattern PDF
Watch: Scarf Tutorial Video
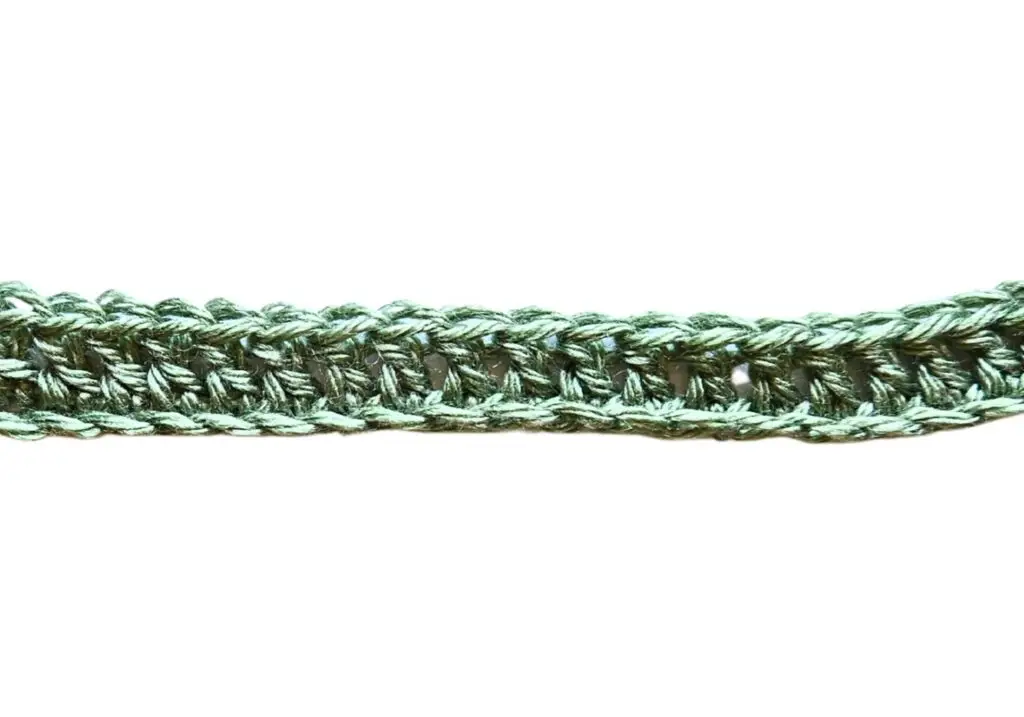
Beginner Half-Double Crochet Scarf Pattern
This scarf is made with only single crochet – so you can focus on building confidence and rhythm.
Pattern:
Ch 25
Row 1: hdc in 3rd ch from hook, hdc across (23)
Ch 2, turn
Row 2: hdc in each st across (23)
Repeat Row 2 until scarf measures approximately. 60″ long (or your preferred length)
Fasten off and weave in ends.
That’s it! You’ve made your first handmade accessory!
Want a wider scarf? Start with 30 chains instead of 25.
Want a longer one? Keep adding rows!
Tips for Measuring
Use a measuring tape to check your scarf’s length as you go – or just drape it around your neck to test the fit.
Tip: Make your scarf as long or short as you like. Classic scarves are around 60 inches, but it’s totally up to you!
Make It Yours
Want to personalize your scarf? Here are a few easy ideas:
- Add fringe to the ends
- Crochet a matching washcloth from Lesson 9 as a gift set
- Add a label or handwritten tag if you’re gifting it
🧶 Need More Guidance?
Don’t forget:
- You can rewatch the scarf tutorial video
- Use stitch markers to keep your edges even
- Count out loud or use a row counter
- Keep a small notebook to track your rows
🎉 Celebrate Your First Wearable Project
You made an actual accessory—something soft, beautiful, and 100% handmade. Whether you wear it, gift it, or hang it in your craft space, this scarf is proof that you can do this.
📸 Show it off with the hashtag #LoopedKnottedFirstScarf
This scarf is just the beginning. Your hands are learning something amazing – and your creativity is only going to grow from here.
💬 Questions or Yarn Woes?
Your edges might not be perfect. You may need to frog a row and redo it. That’s okay. Every maker does that.
The goal isn’t perfection – it’s progress. And you’re making so much of it. Keep going. 🧡
Lesson 12: How to Double Crochet (dc)
Add height and flow to your stitches with this light and airy favorite!
The double crochet stitch is one of the most-used stitches in all of crochet – and for good reason! It’s tall, flowy, fast to work up, and creates a beautiful fabric with lots of drape and movement.
If you’ve mastered single and half double crochet, this next step will feel totally doable. Let’s break it down step by step so you can add this versatile stitch to your growing toolkit!
✨ What You’ll Learn in This Lesson:
By the end of this lesson, you’ll:
- Know how to make the double crochet (dc) stitch
- Practice turning chains and stitch height
- Create a swatch you can turn into a mini cloth or use in future patterns
- Build confidence working with taller stitches
Let’s go!
🧺 What You’ll Need:
✔ Worsted weight yarn
✔ 5.0 mm or 5.5 mm crochet hook
✔ Yarn needle
✔ Scissors
✔ Optional: stitch markers
🎥 Watch: How to Double Crochet (Video)
📏 What is Double Crochet?
Double crochet (dc) is twice as tall as single crochet. That extra height gives you:
- A looser, more open fabric
- Quicker project progress
- Great texture for blankets, scarves, and garments
In patterns, you’ll see it abbreviated as dc.
🔁 How to Make a Double Crochet Stitch (US Terms)
Here’s how to do it:
- Yarn over
- Insert your hook into the stitch
- Yarn over again, pull up a loop (3 loops on hook)
- Yarn over, pull through 2 loops (2 loops left)
- Yarn over, pull through remaining 2 loops
🎉 One dc stitch complete!
📄 Download: Double Crochet Step-by-Step Guide
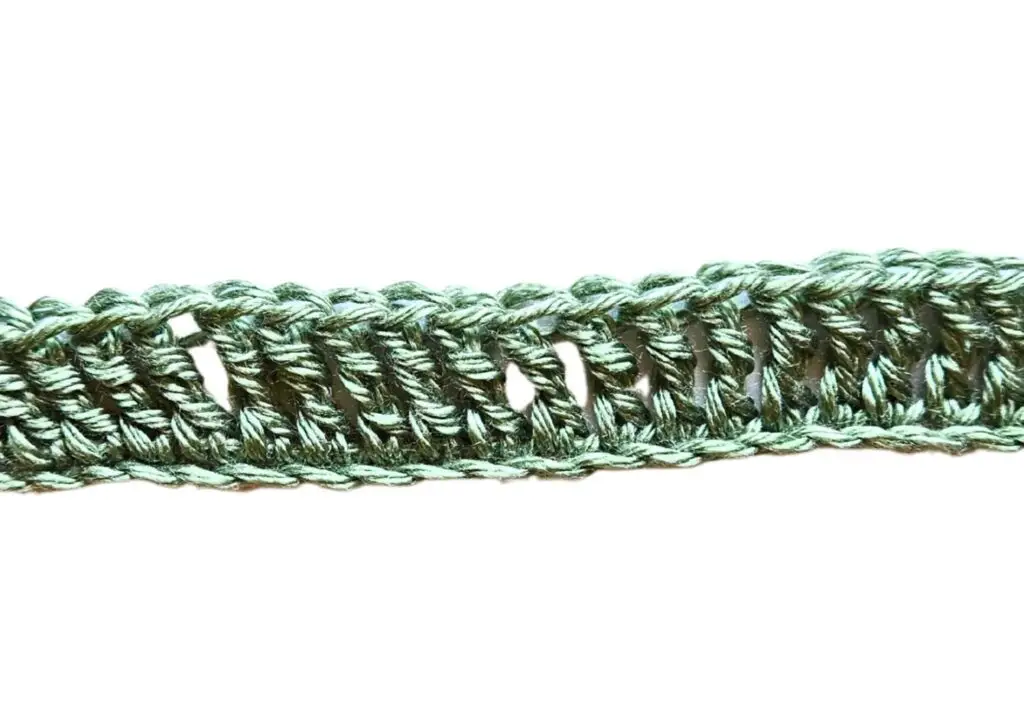
Practice Pattern: DC Swatch
Let’s create a small, relaxing swatch using just dc stitches.
Pattern:
- Ch 21
- Row 1: Dc in the 4th chain from your hook (skipped chains count as first dc). Dc in each chain across. (18 dc + turning chain = 19 stitches)
- Ch 3, turn
- Row 2–10: Dc in each stitch across. (19 dc per row)
Fasten off and weave in ends.
Optional: Add a single crochet border for a finished look.
Tip: If your sides look a little bumpy, that’s normal at first—practice makes progress!
Understanding Turning Chains
In double crochet, you chain 3 at the beginning of each new row. That chain sometimes counts as your first stitch unless the pattern says otherwise.
This helps keep your edges straight
Always remember to read the pattern all the way through. It will let you know if a turning chain counts as the first stitch or not.
Watch: Turning Chains Explained
💡 Where to Use Double Crochet
Double crochet is ideal for:
- Soft scarves
- Lightweight baby blankets
- Dishcloths with texture
- Shawls and garments
- Lacy stitch patterns
It’s often used in granny squares and shell stitches, too!
🌼 Tips for Working with DC
Keep your yarn overs loose – tight loops make pulling through tricky
Count your stitches often (especially around the turning chain)
Use stitch markers to mark your first or last stitch if needed
Want less height? Try half double crochet instead!
🎉 You Did It!
You’ve learned a new stitch that’s going to show up in tons of patterns from now on. The double crochet is one of those essential building blocks that lets you make cozy, flowy, and beautiful things faster and with more variety.
📸 Share your swatch or finished item using #LoopedKnottedDoubleCrochet
Lesson 13: How to Change Yarn Colors in Crochet
Bring your projects to life with stripes, blocks, and color magic!
Adding color to your crochet projects is like switching from pencil to paint. It lets you express your personality, add fun pops of style, and elevate simple patterns into wow pieces.
In this lesson, you’ll learn how to change yarn colors cleanly and confidently, so your work looks neat and professional – without any confusing steps.
You’ve got the stitches. Now let’s add some color!
What You’ll Learn in This Lesson:
By the end of this lesson, you’ll be able to:
- Seamlessly change yarn colors in single crochet
- Fasten off old yarn tails properly
- Weave in ends for a tidy finish
- Use color changes to make stripes, color blocks, or borders
Whether you’re making a two-toned scarf or rainbow coasters, you’ll feel confident switching things up.
What You’ll Need:
Two (or more) yarn colors
Your favorite hook (5.0–5.5 mm)
Yarn needle
Scissors
A small swatch to practice on (use your washcloth or start fresh)
Download: Color Change Practice Pattern (PDF)
Watch: How to Change Yarn Colors (Video Tutorial)
🎨 When to Change Colors
You’ll change yarn at the end of the last stitch in the current color, so your new color is ready to go on the next stitch.
🔁 Step-by-Step: Changing Colors in Single Crochet
Let’s say you’re working with Color A and want to switch to Color B.
- Start your last stitch in Color A:
- Insert your hook, yarn over, pull up a loop (2 loops on hook).
- Now drop Color A and yarn over with Color B.
- Pull through both loops using Color B to complete the stitch.
- Tug gently on both yarns to snug things up.
- Continue crocheting with Color B.
🎉 That’s it! The color switch happens during the last part of the stitch, not after.
✂️ What to Do With Yarn Tails
You’ll have two tails every time you change colors: one from the old yarn and one from the new.
You can:
- Weave them in using a yarn needle (best for clean edges)
- Or crochet over them for fast projects like scarves
💡 Tip: Always leave 5–6 inches of yarn when changing colors – it’s easier to weave in later.
🧪 Practice: Color-Change Swatch
Let’s create a striped mini swatch to practice!
Pattern:
- Ch 21
- Row 1: Dc in 4th chain from hook and each stitch across with Color A (18)
- Row 2-4: Dc in each stitch across.
- Change to Color B on last stitch of Row 4
- Row 5–8: Dc across with Color B
- Change to Color A again on last stitch of Row 8
- Row 9–12: Dc across with Color A
📄 Download: Striped Swatch Pattern (dc)
You now have your first custom-color piece! 🎉
💡 Pro Tips for Clean Color Changes
- Change colors at the end of the row for tidy stripes
- Always fasten off neatly if you’re not carrying yarn up the side
- Weave in ends right away – or batch them after every few rows
- Keep colors high contrast if you want them to pop!
🧶 Project Ideas With Color Changes
Try these beginner-friendly projects that use color switching:
- A striped scarf
- Color block dishcloths
- Two-tone coasters
- Blanket squares with contrasting borders
🎉 You’re a Color-Changing Pro!
You now know how to:
- Add new yarn mid-project
- Create tidy transitions
- Handle yarn tails like a true maker
This unlocks so many creative possibilities – get ready to see your personality shine through every stitch!
📸 Share your swatch using #LoopedKnottedColorPlay
Lesson 14: Striped Kitchen Towel Crochet Pattern (dc)
Welcome to the Project!
You’ve learned how to double crochet – now let’s turn that skill into something useful! This modern kitchen towel features soft vertical stripes, a simple rectangular shape, and an optional hanging loop. It’s perfect for beginners ready to explore color play and real-world projects.
🧵 Materials:
- Worsted weight cotton yarn (#4)
- Main Color (MC): approx. 180–200 yds
- Contrast Color (CC): approx. 80 yds
- 5 mm H/8) crochet hook
- Yarn needle & scissors
- Stitch markers (optional)
📐 Finished Size:
Approx. 16” wide × 24” long (customizable)
🔁 Gauge (not critical):
14 dc x 8 rows = 4” x 4”
🧶 Abbreviations (US Terms):
- ch – chain
- dc – double crochet
- st – stitch
- MC – main color
- CC – contrast color
Notes: The turning chain does not count as a stitch in this pattern.
📃Download: Striped Kitchen Towel Pattern (printable)
✨ Pattern Instructions:
- With MC, ch 63 (or any odd number for desired width)
- Row 1: dc in 4th ch from hook and in each st across. (60 dc)
- Ch 3, turn.
- Row 2 : dc in each st across, ch 3, turn. At end of Row 2, Change color to CC
- Ch3, turn. (at the end of every row and after color change.)
- Row 3: With CC, dc in each st across. At end of row, change to MC
- Row 4-5: MC, dc in each st across
- Row 6: CC, dc in each st across
- Row7-8: MC, dc in each st across
- Row 9-12: CC, dc in each st across
- Row 13-14: MC, dc in each st across
- Row 15: CC, dc in each st across
- Row 16-17: MC, dc in each st across
- Row 18: CC, dc in each st across
- Row 19-20: MC, dc in each st across
- Fasten off and weave in end.
🪢 Optional Hanging Loop:
- Attach yarn to upper-left corner.
- Ch 14, sl st to same st to form a loop.
- Fasten off and weave in tails.
🧼 Finishing:
- Weave in all loose ends.
- Lightly block if needed.
- Wash and dry gently before using or gifting.
🎥 Watch Step-by-step Video:
🎉 You Did It!
You just made a functional, handmade kitchen towel – complete with colorwork and finishing skills! This project proves how powerful a simple stitch can be. Try more color combinations or make a matching set!
📸 Show off your towel with the hashtag #LoopedKnottedStripedTowel
Lesson 15: How to Triple/Treble Crochet (tr)
The tallest of the basic stitches – perfect for airy, flowy fabric!
The triple crochet (also called treble crochet) is tall, lacy, and lightweight, making it perfect for breezy scarves, mesh bags, and openwork shawls. It’s a wonderful stitch to try when you want a change of pace or love stitches that grow quickly!
If you’ve already learned single, half double, and double crochet – you’re totally ready for this one!
✨ What You’ll Learn in This Lesson:
By the end of this lesson, you’ll:
- Understand how to make the triple (treble) crochet stitch
- Learn how to chain and turn for tall stitches
- Create a light and lovely practice swatch
- Explore where to use this stitch in your future projects
🧺 What You’ll Need:
✔ Worsted weight yarn
✔ 5.5 mm or 6.0 mm hook (taller stitches like a slightly larger hook)
✔ Scissors
✔ Yarn needle
✔ Optional: stitch markers
📄 Download: How to Triple Crochet (PDF)
🎥 Watch: How to Triple Crochet (Video)
📏 What is Triple Crochet?
The triple (tr or trc) is the tallest of the common stitches. It creates open, flowy fabric and works up super fast. You’ll love how it adds drape and lightness to your work!
In US patterns, it’s abbreviated as tr.
In UK patterns, “treble” means dc – so always check which terms your pattern is using.
🔁 How to Make a Triple Crochet (US Terms)
Here’s how to do it step by step:
- Yarn over twice (you’ll have 2 wraps on your hook)
- Insert your hook into the stitch
- Yarn over, pull up a loop (4 loops on your hook)
- Yarn over, pull through 2 loops (3 loops remain)
- Yarn over, pull through 2 loops (2 loops remain)
- Yarn over, pull through final 2 loops
🎉 That’s a full triple crochet stitch!
🧶 Practice Pattern: Triple Crochet Swatch
Let’s make a light and breezy square to get comfortable with the stitch.
Pattern:
- Ch 23
- Row 1: Tr in the 5th chain from the hook (the first 4 chains count as your first stitch). Tr in each chain across. (20 tr)
- Ch 4, turn
- Row 2–8: Tr in each stitch across. (20 tr)
Fasten off and weave in ends. That’s it!
💡Tip: Use cotton yarn for a quick-drying washcloth, or keep going to make a lacy scarf.
🔄 What’s a Turning Chain for Triple Crochet?
To begin a new row of tr, you’ll chain 4. That counts as your first stitch.
So when you start the next row:
Chain 4
Skip the first stitch (the chain 4 already counts for it)
Begin working into the second stitch
🌬️ What Projects Use Triple Crochet?
Triple crochet works beautifully in:
- Lightweight scarves and shawls
- Mesh market bags
- Table runners or curtains
- Granny stripe patterns
- Lacy textures mixed with other stitches
- It’s great when you want speed and drape. The fabric is open and airy, especially with soft yarn.
🧵 Tips for Triple Crochet
- Keep your yarn overs relaxed so the loops don’t get too tight
- Count your stitches – especially when you’re first learning turning chains
- If your work feels floppy, try a smaller hook
Want to create mesh? Chain 1 between every tr stitch!
🎉 You Did It!
The triple crochet stitch can seem tall and twisty at first, but you’ve totally got this. You’re now working with one of the tallest, fastest stitches in the crochet world!
📸 Share your swatch using the hashtag #LoopedKnottedTripleCrochet
Lesson 16: Triple Crochet Market Bag Pattern
Lightweight. Reusable. Handmade by you.
Let’s turn your new triple crochet skills into a modern, eco-friendly market bag that you’ll be proud to carry! This bag is lightweight and stretchy, great for holding produce, yarn, or anything you pick up at the farmer’s market.
It’s worked flat in one piece, folded, and seamed up the sides. The tall stitches make it work up quickly – and the open mesh gives it that classic crocheted market bag look.
What You’ll Practice in This Pattern:
- Triple crochet (tr)
- Chain spaces for mesh
- Shaping a rectangle and seaming
- Adding a simple strap
Materials
Worsted-weight cotton yarn – approx. 220–250 yards
5.0 mm crochet hook
Scissors
Yarn needle
Stitch markers
Download: Printable PDF Version of This Pattern
Finished Bag Size
- Width: approx. 12inches
- Height: approx. 14 inches (without straps)
You can easily make the bag larger or smaller by adjusting your starting chain and number of rows!
Abbreviations (US Terms)
- ch = chain
- tr = triple crochet
- sc = single crochet
- st(s) = stitch(es)
- sl st = slip stitch
Instructions
Step 1: Make the Bag Body (Worked Flat)
- Ch 41 (or any odd number to change width)
- Row 1: Tr in 5th ch from hook (counts as first tr), tr in next ch. Repeat from * to end. Turn. (38)
- Row 2: Ch 4 (counts as first tr), skip first st, tr in next st, and each st across. End with tr in top of turning chain. Turn. (38)
- Rows 3–26: Repeat Row 2.
Want it taller? Add more rows!
- Fasten off and weave in ends.
Step 2: Fold & Seam the Sides
- Fold the rectangle in half (short ends together, right sides facing out).
- Use the single crochet stitch to seam up the sides, leaving the top open.
Step 3: Add the Strap
Make 2
- Ch 5
- Row 1: sc in the second chain from the hook and each chain to the end
- Row 2: ch 1, turn, sc in each st
- Rows 3-40: Repeat row 2
- Leave tails at least 5 inches long for sewing to the bag body
- Count 10 stitches from the left and right of the bag, attach handles with whip stitch, repeat on the other side.
- Weave in all ends.
Optional: Add a Decorative Touch
Add tassels or pom-poms to the sides
Use multicolor yarn or alternate rows for stripes
Add a button and loop closure at the top!
Washing Tips
Use cotton yarn for stretch and durability
Wash gently by hand or in a mesh bag, reshape, and lay flat to dry
You Made It!
This project is a perfect blend of form and function – something you can use every day and proudly say, “I made this!”
Show off your bag with the hashtag #LoopedKnottedMarketBag
Lesson 17: How to Crochet a Slip Stitch (sl st)
Sometimes, the smallest stitch makes the biggest difference.
💛 What You’ll Learn in This Lesson:
How to make a slip stitch (sl st)
- When and why to use this simple stitch
- How it differs from other stitches
- Practice tips to make it smooth and even
The slip stitch is the shortest crochet stitch – but don’t underestimate it! You’ll use it to join rounds, finish edges, create neat seams, and even add decorative detail. It’s quick, quiet, and super handy.
🧵 What is a Slip Stitch?
The slip stitch (abbreviated as sl st) is used to:
- Join the end of a round to the beginning
- Move your yarn without adding height
- Seam or finish edges neatly
- Add surface decoration (like faux knit lines or stripes)
Unlike other stitches, a slip stitch doesn’t build height – it simply pulls yarn through.
✨ How to Crochet a Slip Stitch
Insert your hook into the next stitch
- Yarn over
- Pull the yarn through both the stitch and the loop on your hook (in one motion)
✔️ That’s it! No yarn-over before inserting, and no extra loops to pull through.
🎥 Watch me demonstrate both right-handed and left-handed versions of the slip stitch.
✍️ Practice Pattern: Slip Stitch Row
Let’s get comfortable using slip stitches in a real row!
Pattern:
- Chain 15
- Slip stitch in the 2nd chain from the hook and in each across (14 sl st)
- Fasten off, weave in ends
💡 Tip: Keep your tension very gentle – tight slip stitches can be hard to work into!
💬 Common Questions:
Q: Is a slip stitch the same as a slip knot?
A: Great question—nope! A slip knot is how you start your foundation chain. A slip stitch is a technique you use while crocheting to join or finish.
Q: Why are my slip stitches too tight?
A: Try using a slightly larger hook or being extra gentle with your tension. Loose is lovely here.
Q: Can you build fabric with just slip stitches?
A: You can! It creates a dense, knit-like fabric, but it takes longer since the stitches don’t stack high.
🧵 When You’ll Use This Next
You’ll be using slip stitches to:
- Join rounds in granny squares
- Seam your first market bag
- Add neat borders to swatches
- Create loops and closures
🏅 You’ve Learned the Slip Stitch!
This tiny stitch makes a big difference. You now have all the tools to join, finish, and finesse your crochet projects like a pro.
Lesson 18: How to Crochet in the Round
From flat to fabulous – start making circles, squares, and seamless shapes!
Up until now, you’ve worked in straight rows. But many crochet projects – like hats, coasters, baskets, and granny squares -start with a simple circle or loop. That means it’s time to learn how to crochet in the round!
This skill opens up a whole new world of possibilities -and it’s easier than it looks. You’ll learn how to start in the center, work outward, and build shapes that grow round and wide instead of tall and straight.
Let’s go in circles—in the best way!
What You’ll Learn in This Lesson:
By the end of this lesson, you’ll know how to:
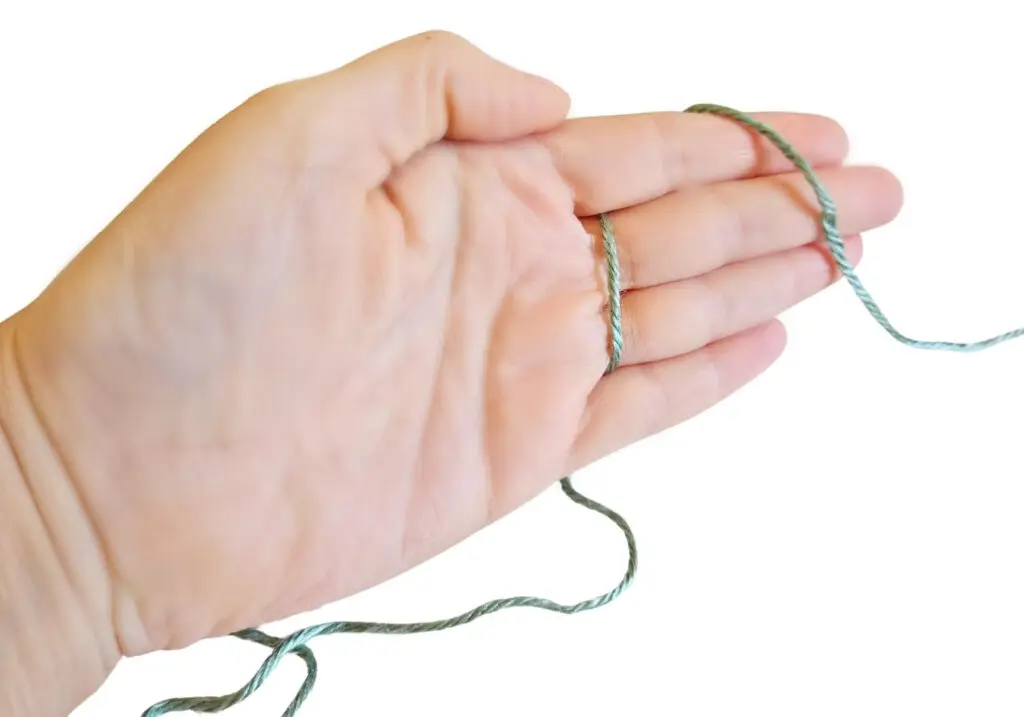
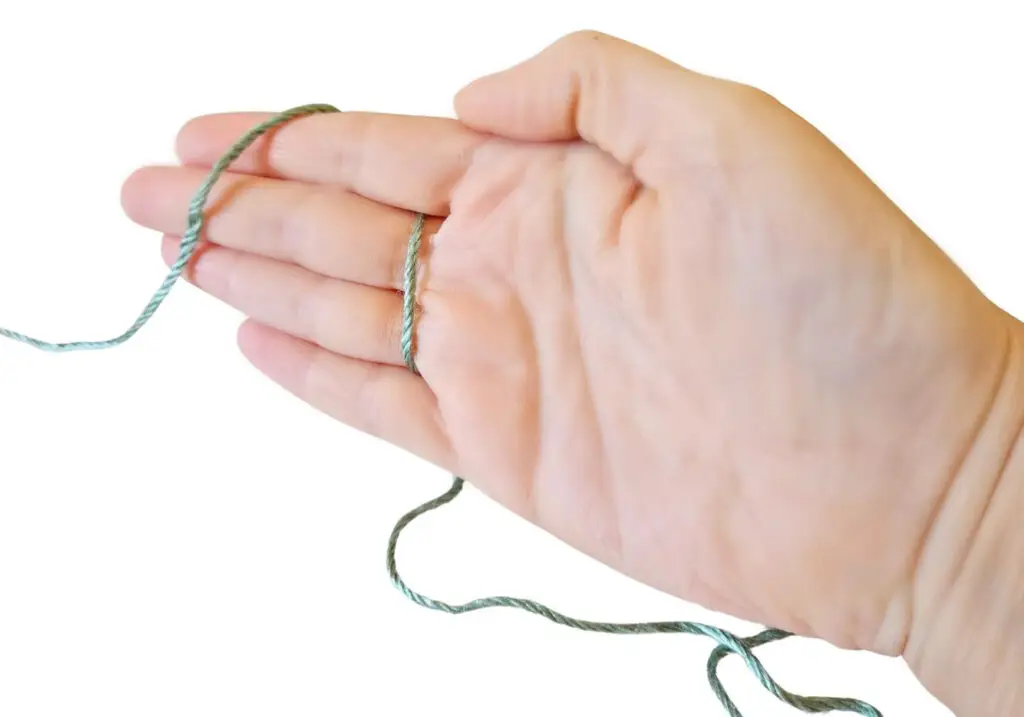
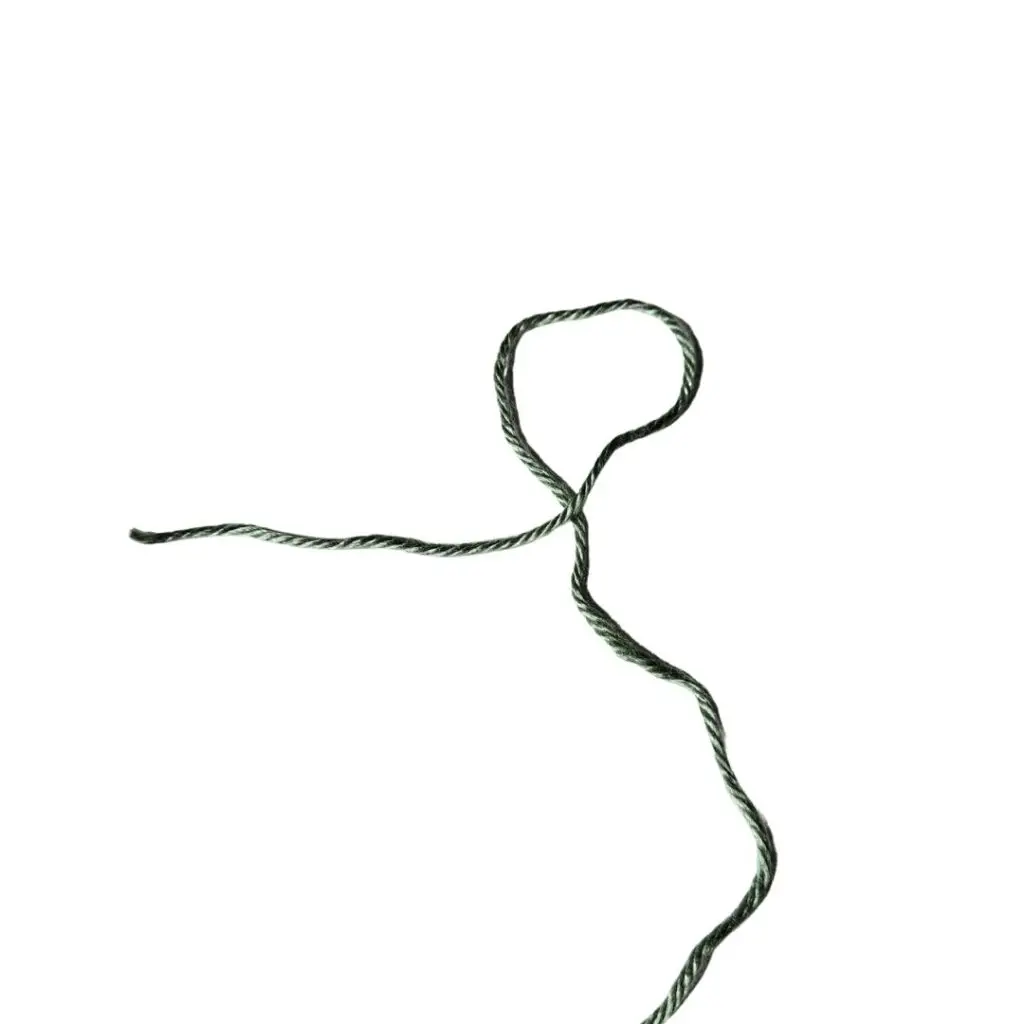
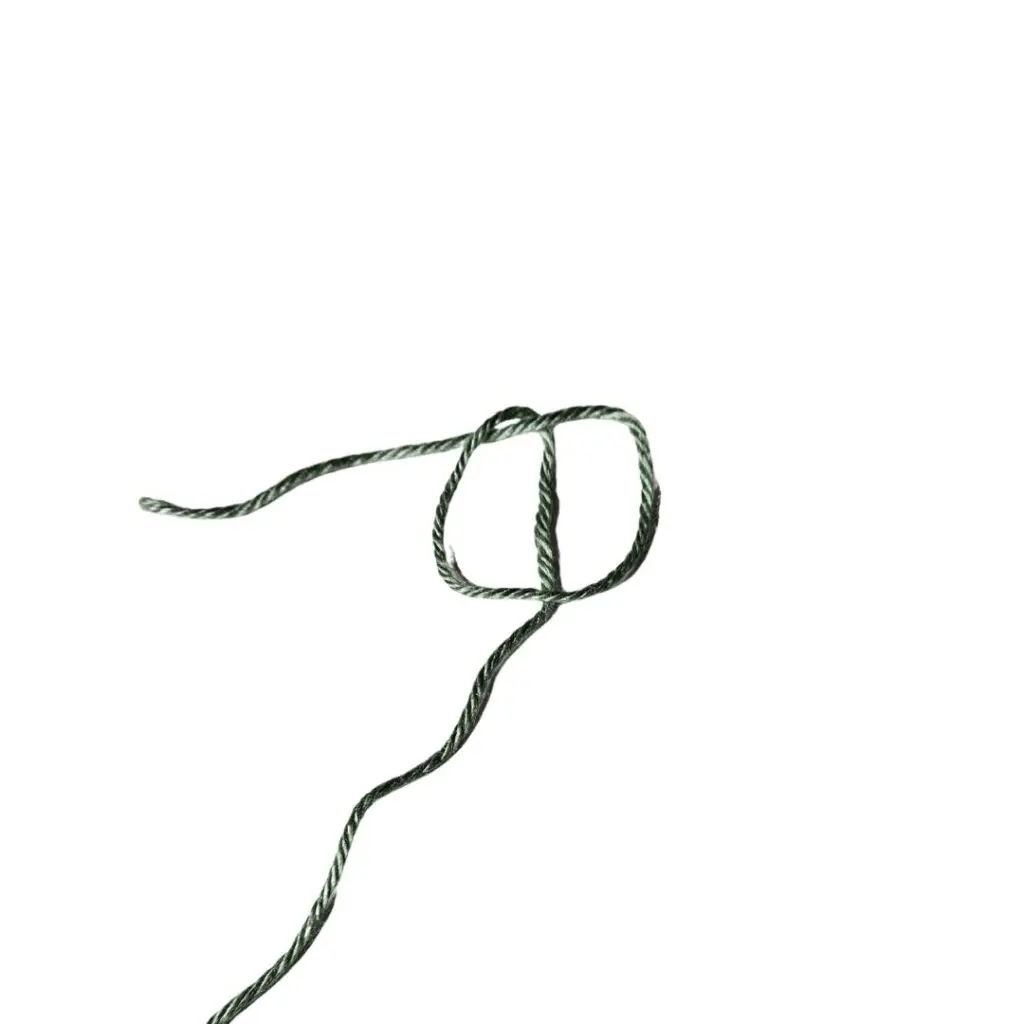
- Start a crochet project “in the round” using a magic ring or chain loop
- Work evenly in a circle using single crochet
- Increase stitches in the round
- Identify your rounds and stitch counts
Ready to get started? You already have the skills – now we’ll just shape them differently!
What You’ll Need:
Worsted weight yarn
5.0 mm or 5.5 mm crochet hook
Yarn needle
Stitch marker (optional but very helpful)
Scissors
Download: Crocheting in the Round Starter Guide (PDF)
Watch: How to Chain-loop and Magic Ring Start
Two Ways to Start a Round
🥇 Option 1: Magic Ring (also called Magic Circle)
This method lets you start with a tightly closed center – great for coasters, hats, and amigurumi.
Steps:
- Wrap yarn into a loop on your fingers
- Insert your hook into the loop, yarn over, pull up a loop
- Ch 1, then start working stitches into the ring
- Pull the tail to close the circle
💡 Tip: If the magic ring feels tricky at first, that’s okay! Try the next method instead.
🥈 Option 2: Chain Loop Start
An easy alternative that’s perfect for practice.
Steps:
- Ch 4
- Join to the first chain with a slip stitch to form a ring
- Work your stitches into the center of the loop
💡 Tip: Your loop will have a small hole in the middle—great for decorative projects!
🧶 Practice Pattern: Easy Round Coaster
Let’s make a flat circle using just single crochet!
Pattern (US terms):
- Round 1: Make a magic ring (or ch-4 loop), work 6 sc into the ring. Join with sl st to first sc. (6 sts)
- Round 2: Ch 1, 2 sc in each stitch around. Join. (12 sts)
- Round 3: Ch 1, sc in next st, 2 sc in next—repeat around. Join. (18 sts)
- Round 4: Ch 1, sc in next 2 sts, 2 sc in next—repeat around. Join. (24 sts)
💡 You can stop here for a coaster or keep increasing to make a placemat, rug, or basket base!
📄 Download: Flat Circle Increase Chart (PDF)
🔁 What Is an Increase?
When you place 2 stitches in the same stitch, that’s called an increase. It helps your work expand outward into a circle or spiral.
💡 Tip: Use a stitch marker to mark the beginning of each round – it helps you stay on track!
🌀 Working in Continuous Rounds (Optional)
Instead of joining and chaining, you can work in a spiral (like amigurumi). It creates a seamless look – but you must use a stitch marker to track your rounds.
💬 Why Learn to Crochet in the Round?
Because it opens the door to:
- Hats
- Coasters
- Baskets
- Stuffed animals (amigurumi!)
- Mandalas
- Granny squares (up next!)
You’ll start seeing this method in LOTS of patterns as you grow. And now, you know how it works.
🎉 You’re Spinning Into Success!
You’ve learned a brand-new technique that will serve you for so many future projects. This is one of those milestone skills that makes everything click.
📸 Share your first circle or coaster using the hashtag #LoopedKnottedRoundwork
Ready for a beginner favorite?
Lesson 19: How to Crochet a Granny Square
Learn the most iconic crochet motif – fun, fast, and full of creative possibilities!
The granny square is one of the most loved and recognizable patterns in the world of crochet. It’s a beginner’s favorite because it’s repetitive, relaxing, and endlessly customizable. Whether you’re making a colorful blanket, a tote bag, or even a pillow, it all starts with a single square.
This lesson will walk you through how to make a basic, traditional granny square – step by step.
✨ What You’ll Learn in This Lesson:
By the end of this lesson, you’ll be able to:
- Crochet a traditional 3-round granny square
- Understand how corner spaces and clusters work
- Change yarn colors between rounds (optional)
- Start building squares for larger projects
Let’s get started with your very first square!
🧺 What You’ll Need:
✔ Worsted weight yarn (1–3 colors if you want to change colors per round)
✔ 5.0 mm or 5.5 mm crochet hook
✔ Scissors
✔ Yarn needle
✔ Stitch marker (optional)
📄 Download: Granny Square Pattern & Diagram (PDF)
🎥 Watch: Step-by-Step Granny Square Video
💡 Before You Begin: Know These Terms
You’ll use:
- Ch = chain
- Dc = double crochet
- Sl st = slip stitch
- Ch space = space created by a previous chain (you’ll work into these)
🧶 Basic Granny Square Pattern (3 Rounds)
🌀 Round 1:
- Ch 4, sl st to first ch to form a ring.
- Ch 3 (counts as first dc), 2 dc into the ring.
- Ch 2 (this makes your corner).
- 3 dc into the ring, ch 2 – repeat 3 more times (you’ll have 4 dc clusters and 4 corners).
- Sl st to the top of the beginning ch-3 to join.
💡 You should see a little square taking shape!
🌸 Round 2:
- Ch 3 (counts as first dc), 2 dc, all into the same corner space.
- In the next corner space: 3 dc, ch 2, 3 dc.
- Repeat around.
- Complete the corner you started in with 3dc
- End with ch 2, sl st to top of beginning ch-3 to join.
🌼 Round 3:
- In each corner: 3 dc, ch 2, 3 dc
- In each side space 3 dc
- Sl st to join
🎉 You now have a full 3-round granny square!
✂️ Optional: Change Colors Each Round
Want a classic, colorful granny? Simply fasten off your yarn at the end of a round and join a new color in any corner space. From there, continue with the next round as usual.
🧶 What Can You Make with Granny Squares?
The possibilities are endless:
- Combine several for a scarf, pillow, or blanket
- Join 4 or 6 for a coaster or placemat
- Add borders and turn one square into a potholder
Stack them up and save for a future patchwork project!
📄 Bonus Download: 5 Projects to Make with Granny Squares (PDF)
🧵 Granny Square Tips for Beginners
- Don’t pull your yarn too tight—relaxed stitches work best
- Use a stitch marker in your first ch-3 if you’re unsure where to join
- Count your corners—each round should have 4
- Blocking helps squares lay flat (just lightly steam or pin and let dry)
🎉 You Did It!
Your first granny square is complete! You’ve officially unlocked a beloved crochet tradition. Whether you make one or a hundred, each square is a little piece of creative joy.
📸 Share yours with the hashtag #LoopedKnottedGrannySquare
Ready to keep the fun going?
Lesson 20: How to Join Granny Squares Together
Turn your squares into something special – one seam at a time!
You’ve mastered the granny square – now let’s bring them together into something beautiful and useful. Whether you’re making a scarf, pillow, tote bag, or cozy blanket, knowing how to join your squares neatly and securely is the key to creating finished pieces that you’ll love for years.
This lesson will teach you three easy joining methods and help you choose the one that works best for your project and style.
✨ What You’ll Learn in This Lesson:
By the end of this lesson, you’ll be able to:
- Join granny squares with a whip stitch, slip stitch, or single crochet
- Choose the right joining method for your project
- Keep your seams neat and your squares aligned
Start planning your first joined-square project!
🧺 What You’ll Need:
✔ Your completed granny squares
✔ Yarn (same or contrasting color for joining)
✔ Yarn needle or crochet hook
✔ Scissors
✔ A flat surface or table to lay out your squares
🧩 First: Arrange Your Squares
Lay your finished squares out on a flat surface like a table or floor. Rearrange until you love the layout – this is your design moment! Try mixing:
- Solid and multicolored squares
- Light and dark shades
- Similar stitch tension (it helps everything line up!)
🔗 Option 1: Whip Stitch Join (Sewn Method)
This method uses a yarn needle and creates a nearly invisible seam – great for neat, clean projects.
Steps:
Place two squares right sides together (pretty sides touching).
- Thread your yarn needle with matching yarn.
- Insert the needle through the back loops only of both edges.
- Whip stitch across, one stitch per pair of loops.
Open the joined squares flat – it’s nearly invisible!
💡 Best for: Blankets, scarves, pillow fronts
🪢 Option 2: Slip Stitch Join (Crocheted Method)
Creates a slightly raised seam – great for decorative edges.
Steps:
- Place squares right sides facing out (so you can see your work).
- Join yarn in the corner of two squares.
- Slip stitch through the back loop only of both edges.
- Continue across the edge, keeping tension loose.
💡 Best for: Projects with contrast yarn joins or visible seams
🧶 Option 3: Single Crochet Join (Visible, Textured Join)
This creates a firm, slightly raised seam – ideal when you want a bold join.
Steps:
- Hold squares together with right sides facing out.
- Join yarn in corner space, ch 1.
- Sc through both loops of both squares across the edge.
- Continue to join all squares row by row.
💡 Best for: Bags, placemats, bold blanket seams
🔁 Join Row by Row or Square by Square
You can:
- Join in rows (horizontally across, then vertically down)
- Join each square one at a time as you go
- Or make panels and connect those later
💡 Tip: Use stitch markers to hold squares together while joining to stay aligned.
💬 Don’t Worry About Perfection
Your squares may not be exactly the same size – and that’s okay. Handmade means heartmade. If something doesn’t line up perfectly, just adjust gently or block your squares to help them match.
🧺 Blocking = lightly dampen and pin your square into shape, then let it dry flat.
🎉 You Did It!
You’ve now moved beyond individual squares and started creating full pieces – and that’s a big step in your crochet journey. Joining may seem simple, but it’s what brings your vision to life.
📸 Share your joined project using the hashtag #LoopedKnottedJoins
Ready to put your color and joining skills to use in a full project?
Lesson 21: Let’s Crochet a Granny Square Scarf
Stitch your creativity into a beautiful, one-of-a-kind accessory.
You’ve learned how to make a granny square. You’ve practiced joining them. Now, let’s bring it all together into your first wearable project made entirely from motifs – a cozy, colorful granny square scarf!
This is a beginner-friendly pattern you can customize with your favorite colors and textures. Whether you want a bold rainbow statement or soft neutrals, this scarf will feel uniquely you.
✨ What You’ll Learn in This Lesson:
By the end of this lesson, you’ll:
- Plan, crochet, and assemble a full scarf made from granny squares
- Practice color choices, joining methods, and consistent tension
- Add finishing touches like borders and fringe (optional)
Celebrate your growth as a confident, creative crocheter!
🧺 What You’ll Need:
✔ 10-20 completed granny squares (more if you want a longer scarf)
✔ Worsted weight yarn (same or coordinating colors)
✔ 5.0 mm or 5.5 mm crochet hook
✔ Yarn needle
✔ Scissors
✔ Optional: measuring tape, stitch markers, fringe, or pom-poms
📏 Plan Your Scarf Layout
Lay out your granny squares in a single column or two-row strip. A standard scarf is around 6–8 inches wide and 50–60 inches long, but feel free to adjust based on your style.
💡 Tip: Mix light and dark squares for contrast, or arrange by gradient for a blended look.
🧶 Step-by-Step: Granny Square Scarf Pattern
- Make Your Squares
Use the basic granny square pattern from Lesson 14. Aim for 6 to 10 squares of similar size.
- Join the Squares
Choose your favorite joining method from Lesson 15:
- Whip stitch (neat & invisible)
- Slip stitch (decorative ridge)
- Single crochet (bold & textured)
Join all squares in a vertical line to form one long strip.
- Optional: Add a Border
Once your scarf is one piece, add a simple single crochet or granny-style border around the outer edge.
- Optional: Add Fringe or Pom-Poms
Cut strands of yarn and loop them into each corner for fringe, or attach premade pom-poms for a playful finish!
🧵 Make It Your Own
This scarf is your canvas – you can:
- Use all one color for a modern twist
- Mix scraps for a patchwork look
- Add an extra round to some squares to make them “pop”
Make matching wrist warmers or a hat next!
💡 Want it wider? Make two columns of squares and join them side-by-side!
🎉 You Made a Wearable Masterpiece!
You’ve gone from making one square to creating a fully finished, totally wearable crochet project. This scarf is more than yarn – it’s a symbol of your creativity, patience, and growth.
📸 Show it off with the hashtag #LoopedKnottedScarfProud
Whether you wear it out, wrap it up as a handmade gift, or keep it as a cozy reminder of how far you’ve come, your granny square scarf is something to be truly proud of.
Ready for the final stretch?
Lesson 22: What to Crochet Next
You’ve built the skills – now let’s build your next favorite project!
You’ve completed the beginner crochet journey. You’ve learned the stitches, made a scarf, and created beautiful granny squares. Now you might be wondering:
“What do I make next?”
This lesson is all about choosing your next project with confidence, finding patterns that match your skill level, and building on what you already know – without overwhelm.
The best part? You’re no longer a beginner. You’re a maker.
✨ In This Lesson, You’ll Discover:
- 6 beginner-friendly projects to try next
- How to choose patterns that fit your skill level
- Tips for growing without feeling stuck
- Where to find trusted, simple patterns
You don’t have to dive into a giant blanket or a complex garment. Let’s keep it fun and manageable while you grow.
🧶 6 Beginner-Friendly Project Ideas
These projects use the skills you’ve already learned—and help you add just one new concept at a time:
- Dishcloth Set
✔ Easy square shape
✔ Great for stitch practice
✔ Makes a lovely gift
→ Try new stitches like the moss stitch!
- Simple Beanie Hat
✔ Worked in the round
✔ Repeats basic stitches
✔ Great introduction to shaping
→ Use single or double crochet and learn basic decreases.
- Crochet Coasters
✔ Small and quick
✔ Perfect for practicing in the round
✔ Use scrap yarn and make sets!
→ Add borders or experiment with color changes.
- Granny Square Blanket (Grow Your Scarf!)
✔ Build on your previous squares
✔ No pressure – just join as you go
✔ Make it lap-sized or full-sized
- Tote Bag from Squares
✔ Reuse granny squares or practice rectangles
✔ Learn basic seaming and handle shaping
✔ Useful and stylish!
- Striped Scarf or Shawl
✔ Relaxing, meditative rows
✔ Combine color and stitch texture
✔ Perfect for gifting or wearing
🧾 How to Pick the Right Pattern for You
When you’re looking at patterns, ask:
🧵 What stitches are used? (Look for patterns using stitches you know, like sc or dc.)
📏 What size is it? (Start small so you can finish and feel proud!)
📸 Are there photos or tutorials? (Visual learners—this is key!)
🌟 Is it labeled beginner or easy? (That’s your comfort zone for now.)
💡 Tip: Don’t be afraid to repeat simple projects in new colors or yarns. Repetition = confidence.
📚 Where to Find Patterns You Can Trust
- Looped and Knotted Blog – Start with my beginner patterns made just for you
- Ravelry – Filter by “beginner” and read reviews
- Etsy – Support independent designers (check ratings!) My Etsy Shop!
- Pinterest – Search: “easy crochet [item] pattern free”
- YouTube – Find video tutorials for visual help
💡 Keep Learning, Gently
Every time you try something new, your confidence will grow – even if it’s a little messy at first. That’s part of the process!
👉 Choose ONE new stitch, ONE new shape, or ONE new technique per project.
That way, you stretch your skills without stress.
🎉 You’re Not Just Learning – You’re Creating
You’ve built the foundation. Now your creativity can flourish. Your next project is waiting for your hands to bring it to life.
📸 Tag your next make with #LoopedKnottedNext
💬 Want Help Choosing What to Make Next?
You’re not alone! I’d love to help you pick a next project based on your style, time, and goals. Reach out anytime, or browse my Beginner Pattern Collection for inspiration.